Events
Turn on custom statuses for an event type
Show your team's progress labels on one service so the calendar and Progress board match how the shop actually works.
What you will accomplish
You will turn on Enable Custom Statuses for one service and attach the labels your team already uses—such as Queued for shop, In the bay, Waiting on parts, and Ready for owner.
After that, staff can change the label on the event. The Schedule Progress view can show those labels as columns. Everyone sees the same picture of what is waiting, active, stuck, or finished.
When to use this
Turn custom statuses on when the built-in labels (To Do, In Progress, Done) are not specific enough.
Good fits:
- Shop work that pauses for parts (Waiting on parts).
- A busy service day where you need to see which cars are In the bay.
- Handoffs where the last step is Ready for owner, not only Done.
Leave the switch off for simple visits that only need scheduled vs finished.
Before you start
- You can open Settings > Services & schedule as an owner or admin.
- The event type already exists. If not, start with Configure event types.
- Agree on three to five labels the floor team will actually say out loud. More labels slow people down.
- Know which built-in bucket each label belongs to: To Do, In Progress, Blocked, or Done.
Open the service and turn on Enable Custom Statuses
- Open Services & schedule
- Click Advanced
Find the service—for example Internal Service—and click Advanced.
Expected result: The Edit Event Type page opens and saves as you work.
- Scroll to Enable Custom Statuses
The switch sits just below Checklist Items (if you use a checklist).
The helper text explains that these statuses appear on the calendar and progress board. Each one maps to To Do, In Progress, Blocked, or Done so billing, reporting, and notifications stay consistent.
- Turn the switch on
Flip Enable Custom Statuses on.
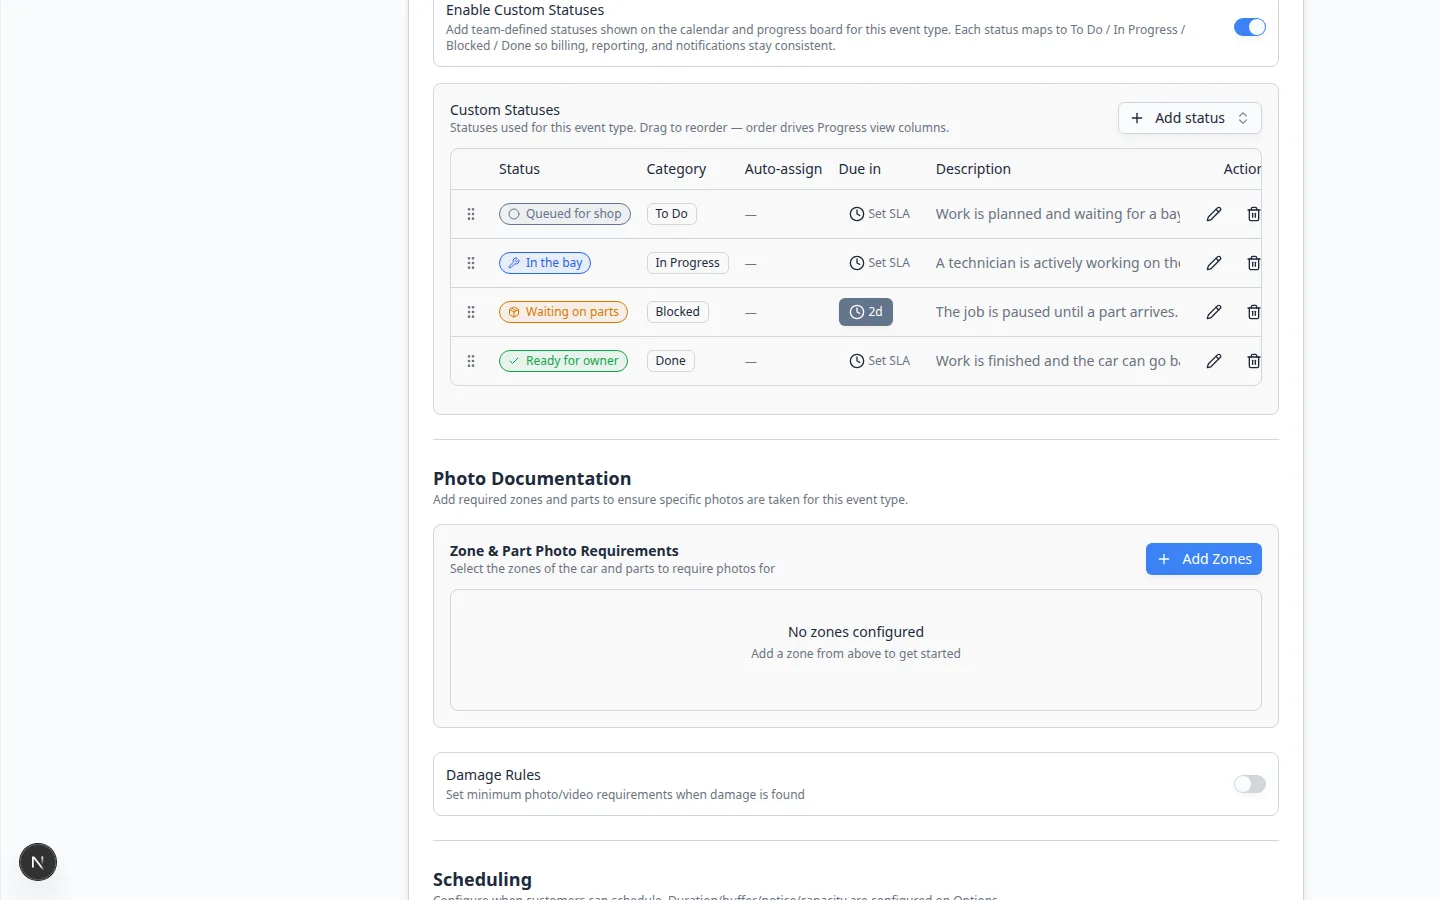
Expected result: A Custom Statuses table appears. If nothing is attached yet, you see No custom statuses assigned yet.
Add statuses to this service
- Click Add status
Click Add status on the right of the Custom Statuses heading.
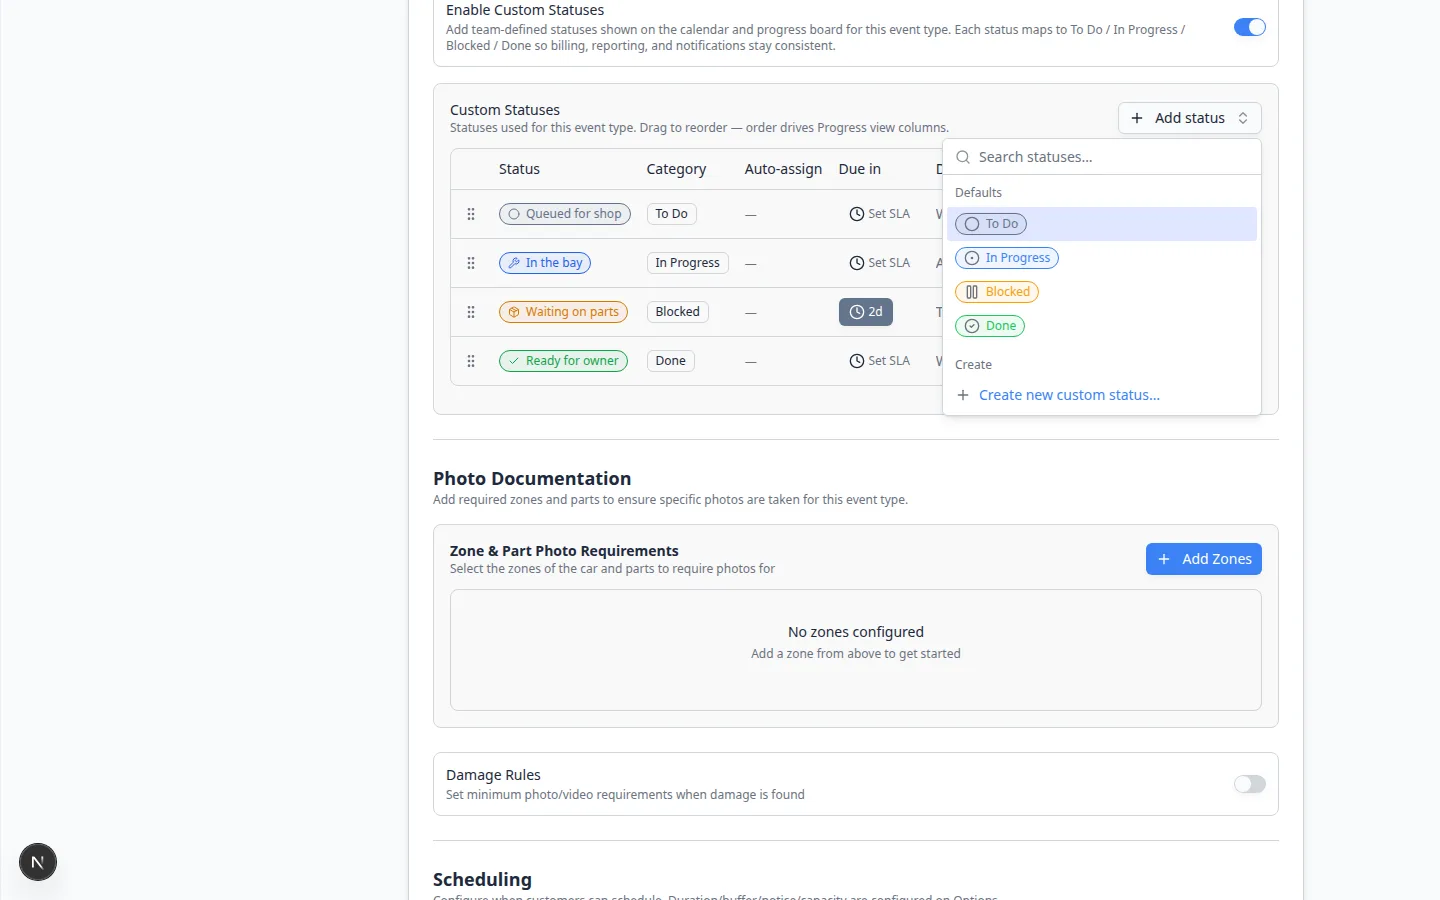
Expected result: A search list opens with Search statuses…, plus groups named Defaults, Team library (if you already created labels), and Create.
- Add a default when you want a quick start
Under Defaults, click To Do, In Progress, Blocked, or Done.
Use this when you have not named shop-specific labels yet.
- Add a label from Team library
If your facility already created names such as Waiting on parts, click that row.
Expected result: The table gains a row with the name, category, and description.
- Create a new custom status when the name does not exist
Click Create new custom status…. Fill in the name, description, category, color, and icon the same way you would in Manage custom statuses and amenities.
Expected result: The new label is saved to the team library and attached to this event type.
Understand the table columns
| Column | What it means |
|---|---|
| Status | The name staff see (for example In the bay). |
| Category | The built-in bucket: To Do, In Progress, Blocked, or Done. |
| Auto-assign | An optional teammate who is added when this status is chosen. |
| Due in | Optional time limit for how long a job should stay in this status. Click Set SLA if waiting too long should show as overdue. |
| Description | A short note so new staff pick the right label. |
Drag the handle on the left to reorder rows. The order becomes the column order on the Progress view when staff filter to this event type.
Use the pencil to edit a label. Use the trash can to remove it from this service. Removing it here does not always delete it from the team library.
See the labels where staff work
- Open a test event
On Schedule, open an appointment that uses this event type. Click Open Event.
- Find the status control
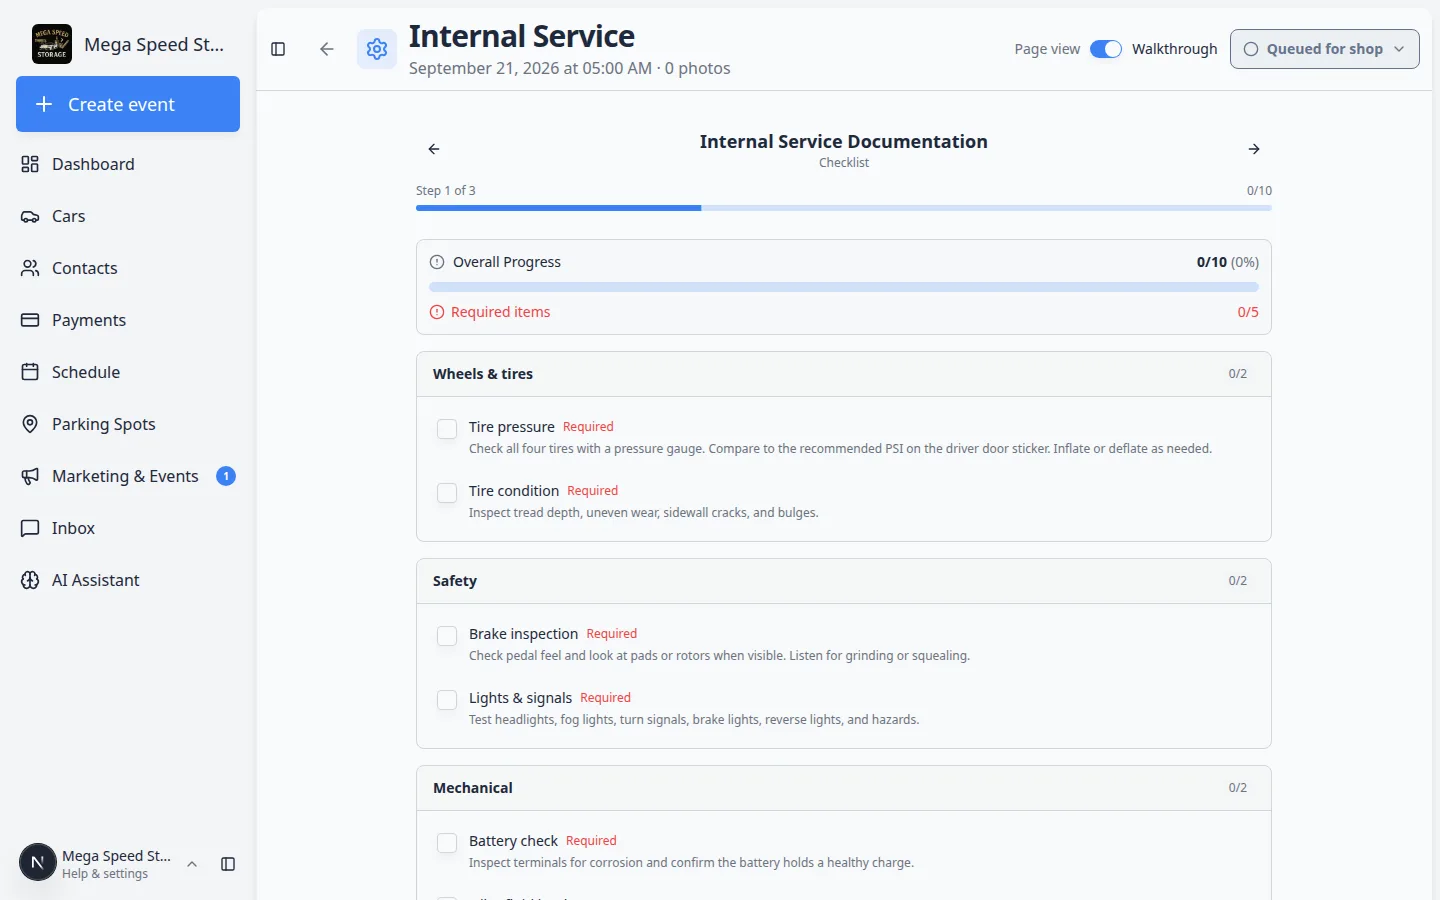
At the top of the walkthrough you should see the current label—for example Queued for shop.
Expected result: Staff can change the label as the job moves (queued → in the bay → ready for owner).
- Open Progress view on Schedule
Go to Schedule. Open Filters & settings, then choose Progress.
Expected result: You see columns that match the labels you attached, grouped by To Do / In Progress / Blocked / Done. See Track work in the Progress view.
What success looks like
- This service shows the shop's real words—not only To Do and Done.
- A blocked job (Waiting on parts) is easy to spot on the Progress board.
- Each label still maps to To Do / In Progress / Blocked / Done, so reports stay comparable.
- Teammates do not invent extra names in the notes field.
Troubleshooting
What to do next
If this service also needs a check-off list during the visit, continue with Set up event checklists.
To rename or color labels for the whole facility, use Manage custom statuses and amenities.
Then run Test an event setup and show the floor team where to change the status on Open Event.