Inbox
Send a text message from Inbox
Send a short customer text, add an image when needed, and confirm the message appears in the conversation history.
Use text messages for short updates that customers should see quickly.
Good examples include pickup reminders, arrival instructions, quick confirmations, and simple follow-up questions.
What you will accomplish
- Send a clear text from the correct customer conversation.
- Add a photo when it helps the customer understand the update.
- Confirm the message appears in the timeline for your whole team.
Before you start
- Text messaging must be set up for your team. If Text is disabled, review Configure communication settings for Inbox.
- The customer should have a valid phone number on file, or you should be sure the unsaved number belongs to the right person.
- Keep the message short. Use email or a call for long explanations.
- If you are sending a photo, make sure it is appropriate for the customer to receive.
Open the conversation
- Go to Inbox
Open Inbox.
- Select the customer
Click the customer conversation in the list.
If the conversation does not exist yet, use Start a new Inbox conversation.
- Review the latest messages
Read the recent timeline before writing.
This helps you avoid asking a question the customer already answered.
Choose Text or Email at the bottom
Before you type, look at the bottom of the conversation area. You will see two tabs:
- Text — for short, fast updates the customer will see on their phone.
- Email — for longer answers that need a subject line or a formal written record.
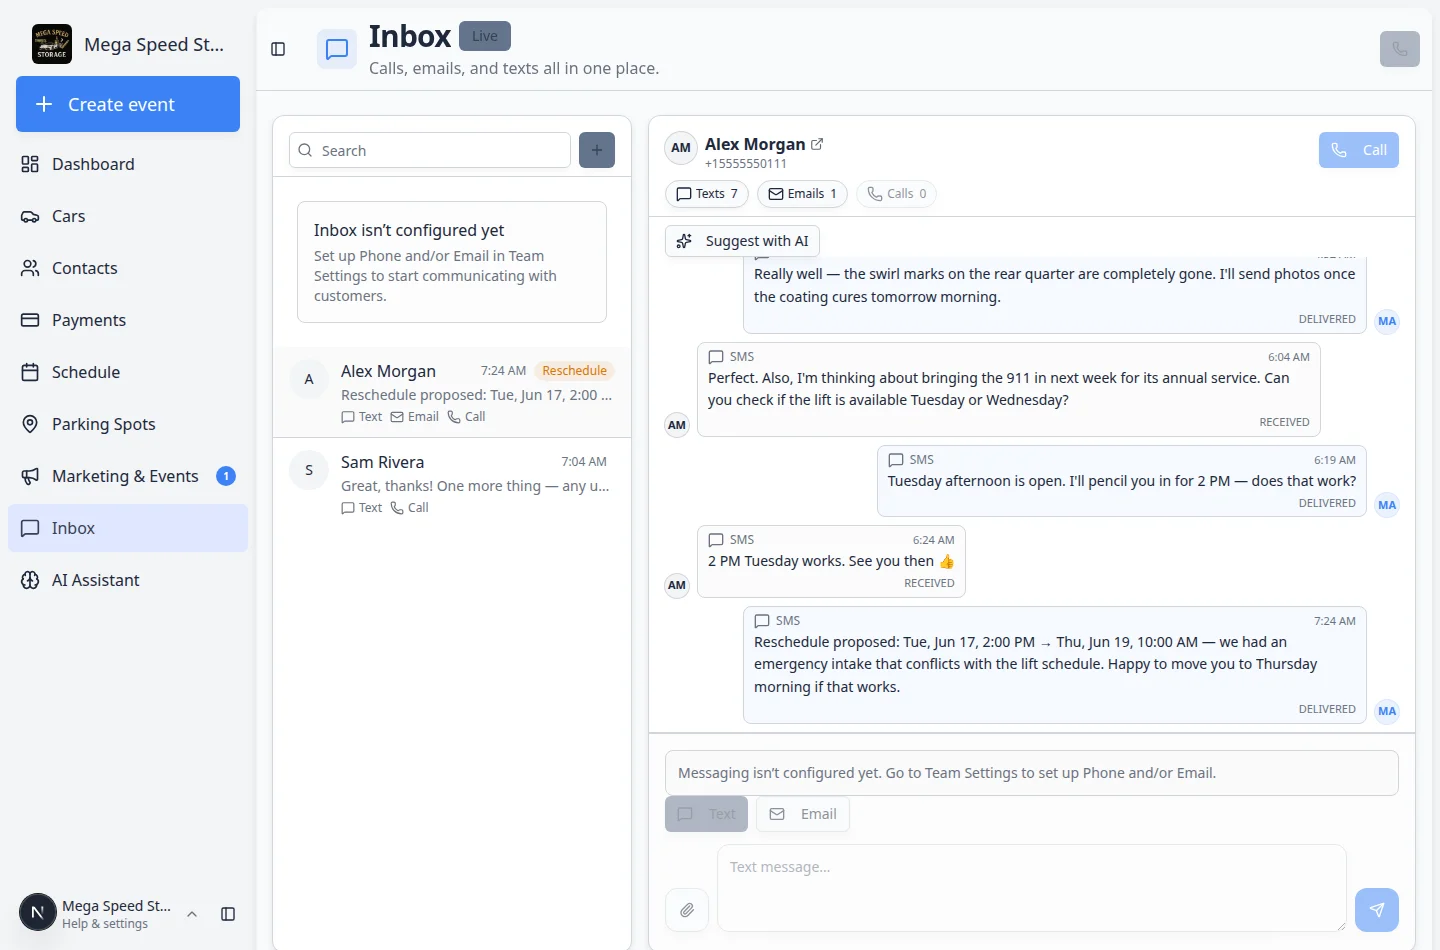
Write and send the text
- Click Text
At the bottom of the conversation, click Text.
The text composer shows a field labeled Text message….
- Type your message
Write a short, clear message.
Include the important detail first. Example: "Hi Alex, yes. We will stage the Huracan at the front door tomorrow at 10 AM."
Keyboard tip: Press Enter to send. Press Shift+Enter to start a new line without sending.
- Check the message before sending
Confirm the customer, car, date, time, and location are correct.
This step matters because text messages often reach customers immediately.
- Click the send button
Click the round blue send button at the right side of the text field (paper plane icon).
The message appears in the timeline after it sends.
Expected result: Your outbound text appears in the timeline as a team message with a DELIVERED status when texting is configured.
Add an image to a text
Use an image when it helps the customer understand the update. For example, you may send a photo of a vehicle staged for pickup or a close-up of a part the customer asked about.
- Click the paperclip button
In the text composer at the bottom of the conversation, click the paperclip button to the left of the message field.
On a phone or tablet, this icon may look like a small clip.
- Choose the image
Select one or more images from your computer or device.
You can attach up to ten images on a single text. Each image appears as a small preview above the message field. Click the × on a preview to remove an image before sending.
Use clear images. Avoid blurry photos or photos that show unrelated customer information.
- Add a short note (optional)
Type a brief message that explains the image when it helps.
Example: "Here is the front-left tire photo you asked for."
You may send images without text when the photo alone answers the customer's question.
- Send the message
Click the send button.
The image and message appear in the conversation timeline.
Expected result: The customer sees both your note and the image in the same text thread. A small preview of each attached image appears above the message field before you send.
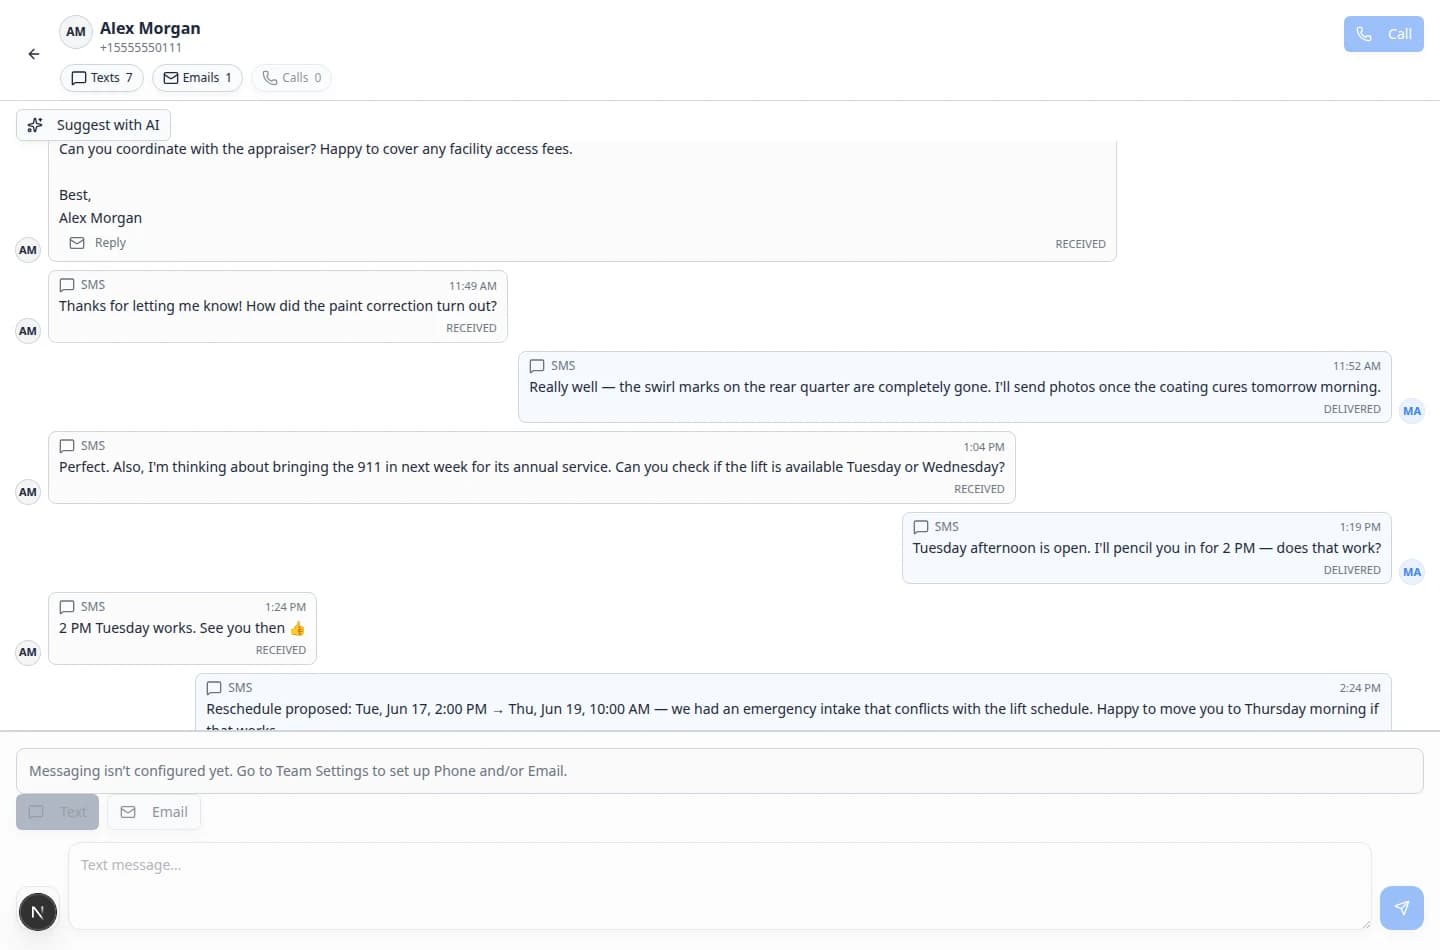
Know when a message actually sent
After you click send, watch the timeline—not just the message box.
- Look for your message in the timeline
Your outbound text should appear on the right side of the conversation within a few seconds.
Expected result: The bubble shows DELIVERED when texting is configured and the carrier accepted the message.
- If nothing appears
Check for a red error toast at the bottom of the screen. Common causes include texting not configured, a missing customer phone number, or a number formatted without an area code.
Ask an admin to review Configure communication settings for Inbox.
What success looks like
- The sent text appears in the conversation timeline.
- The timeline shows the message as an outbound team message.
- If you attached an image, the image appears below the message.
- The customer can understand what you need or what happened next.
Tips for better customer texts
- Keep one text focused on one topic.
- Use exact times, such as 10 AM, instead of vague wording like "soon."
- Include the vehicle name when the customer has more than one car.
- Do not send sensitive payment details by text. Use email, invoice links, or the customer portal when appropriate.
- If a customer seems upset or confused, consider calling instead of sending several texts.
Troubleshooting
What to do next
If the topic becomes too long for text, switch to Send an email from Inbox or use the Call button from the conversation.