Facility Web Pages
Set up customer registration
Configure the public registration flow for prospects and new customers.
What you will accomplish
Prospects will complete one registration form on your public page. Your team will receive their details in Contacts so you can review the request before inviting them to the portal.
When to use this guide
Use this guide when you want new customers to request storage online instead of emailing forms or calling your office.
When you finish:
- The public registration link works from your website or facility page.
- The form asks only for information your team needs at first contact.
- Your team knows where submitted requests appear.
Before you start
- Decide what information you need from every new customer (contact info, vehicle details, documents, payment).
- Confirm your team is ready to review new requests in Contacts.
- Turn on your public pages in Settings > Website & customer app under Public website.
- If you will collect payment during signup, finish Connect payment processing first.
Step 1: Turn on the online registration form
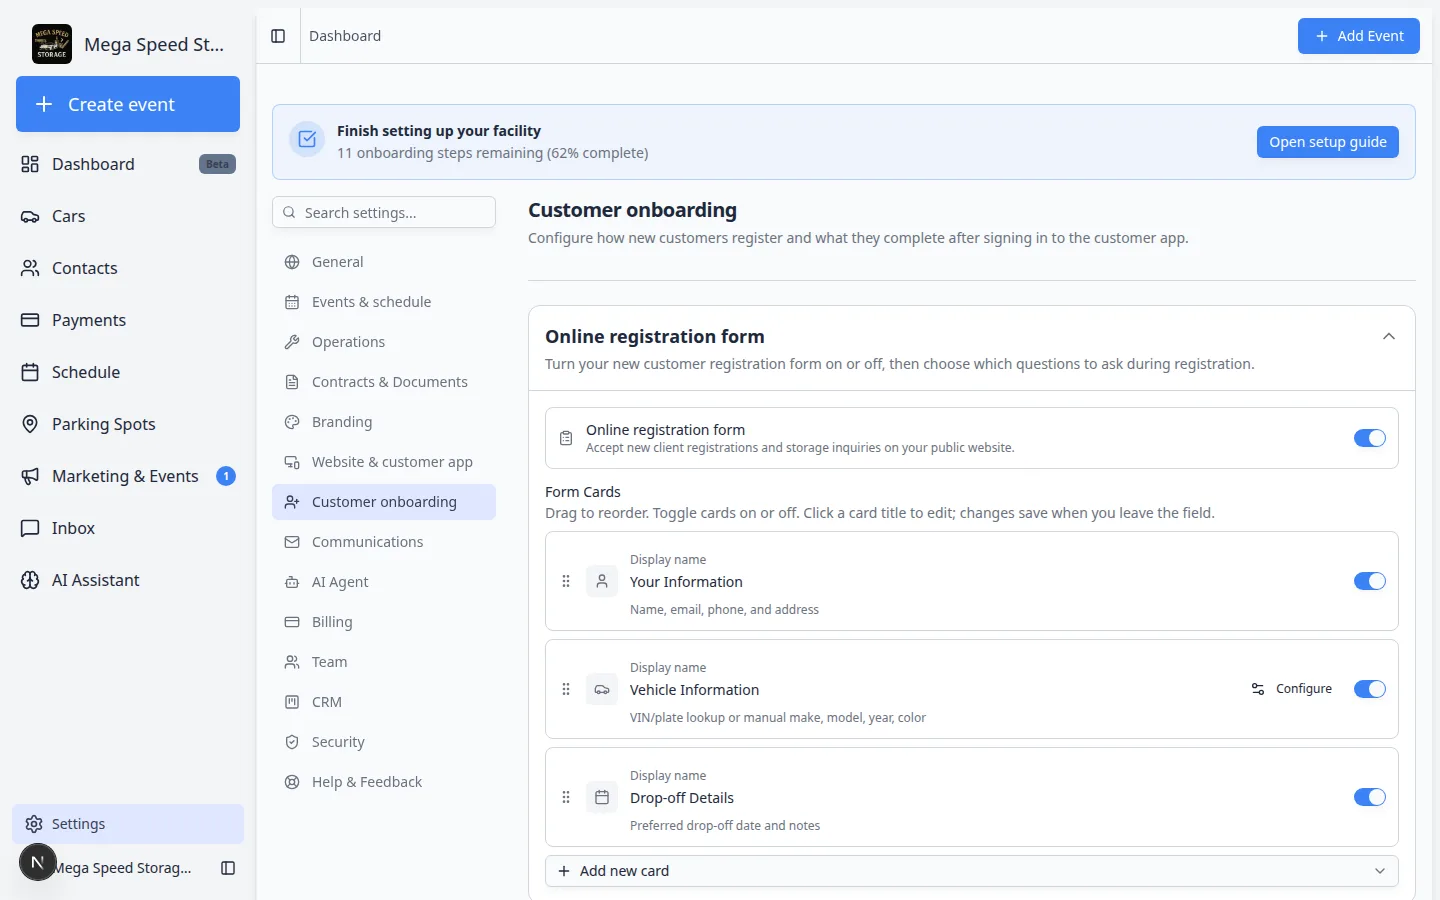
- Open Customer onboarding
Go to Settings > Customer onboarding.
Expected result: The page title is Customer onboarding.
- Open Online registration form
Find the Online registration form section and click the heading if it is collapsed.
Expected result: You see a switch labeled Online registration form and a list of Form Cards below it.
- Turn the form on
Turn the Online registration form switch on.
Why this matters: When this switch is off, your public registration link will not accept new submissions—even if the link still opens.
Step 2: Choose which form cards to show
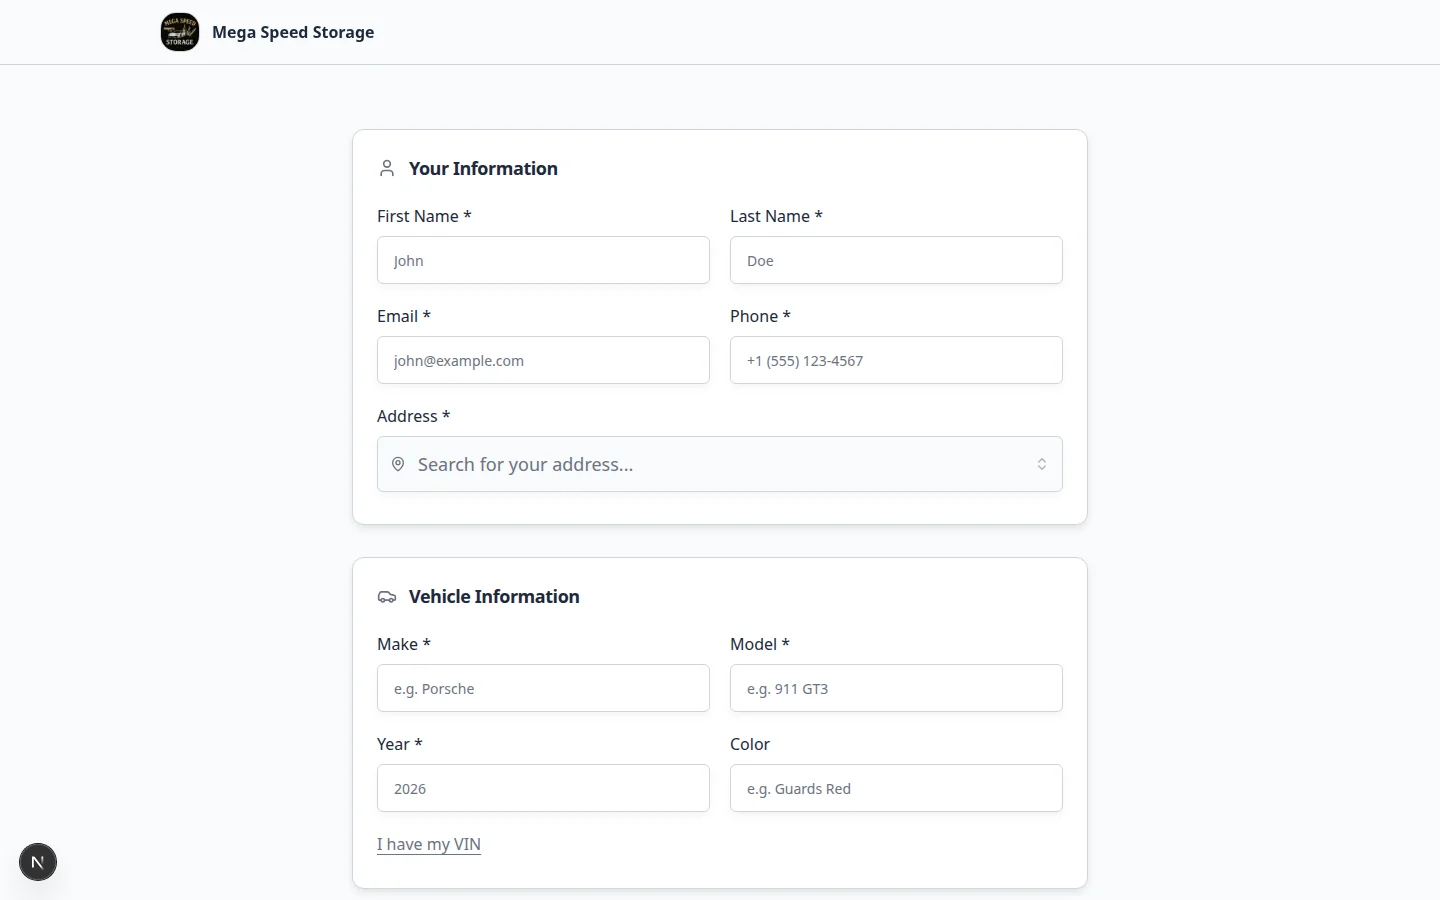
Each Form Card is one section of the registration form.
Common cards include:
- Your Information — name, email, phone, and address.
- Vehicle Information — make, model, year, VIN, or license plate.
- Drop-off Details — preferred arrival date and notes.
- Payment — only if your team is ready to collect payment during signup.
- Additional contacts — spouse, assistant, or company contact.
- Documents — insurance, registration, or ID uploads.
- Custom Questions — extra fields your team configured.
- Turn on only the cards you need
Use the switch on the right side of each card.
Keep the first version short. You can collect extra details after your team speaks with the customer.
- Drag cards into a friendly order
Drag the handle on the left to reorder cards.
A simple order: Your Information → Vehicle Information → optional cards such as Drop-off Details or Documents.
- Configure a card when you see Configure
Some cards have a Configure button (for example Vehicle Information).
Click Configure to choose which fields appear, then save.
Expected result
The form feels natural: easy questions first, detailed questions later.
Step 3: Turn on registration on your public page
- Open Website & customer app
- Turn on Registration form in Page editor
Scroll to Public website → Page editor. Turn on the Registration form section (or Storage inquiry if you prefer a button that leads to registration).
Why this matters: The Registration card in Shareable links appears only when registration is enabled.
Step 4: Copy your registration link
- Open Website & customer app
- Find Shareable links
Near the top, find the Shareable links section.
- Copy Registration
On the Registration card, click Copy.
The link usually ends with
/registration.Expected result: You copied the full link—not just part of the address.
Step 5: Test the registration form
- Open a private browser window
Use a private or incognito window so you are not signed in as staff.
- Paste the registration link
Open the link you copied.
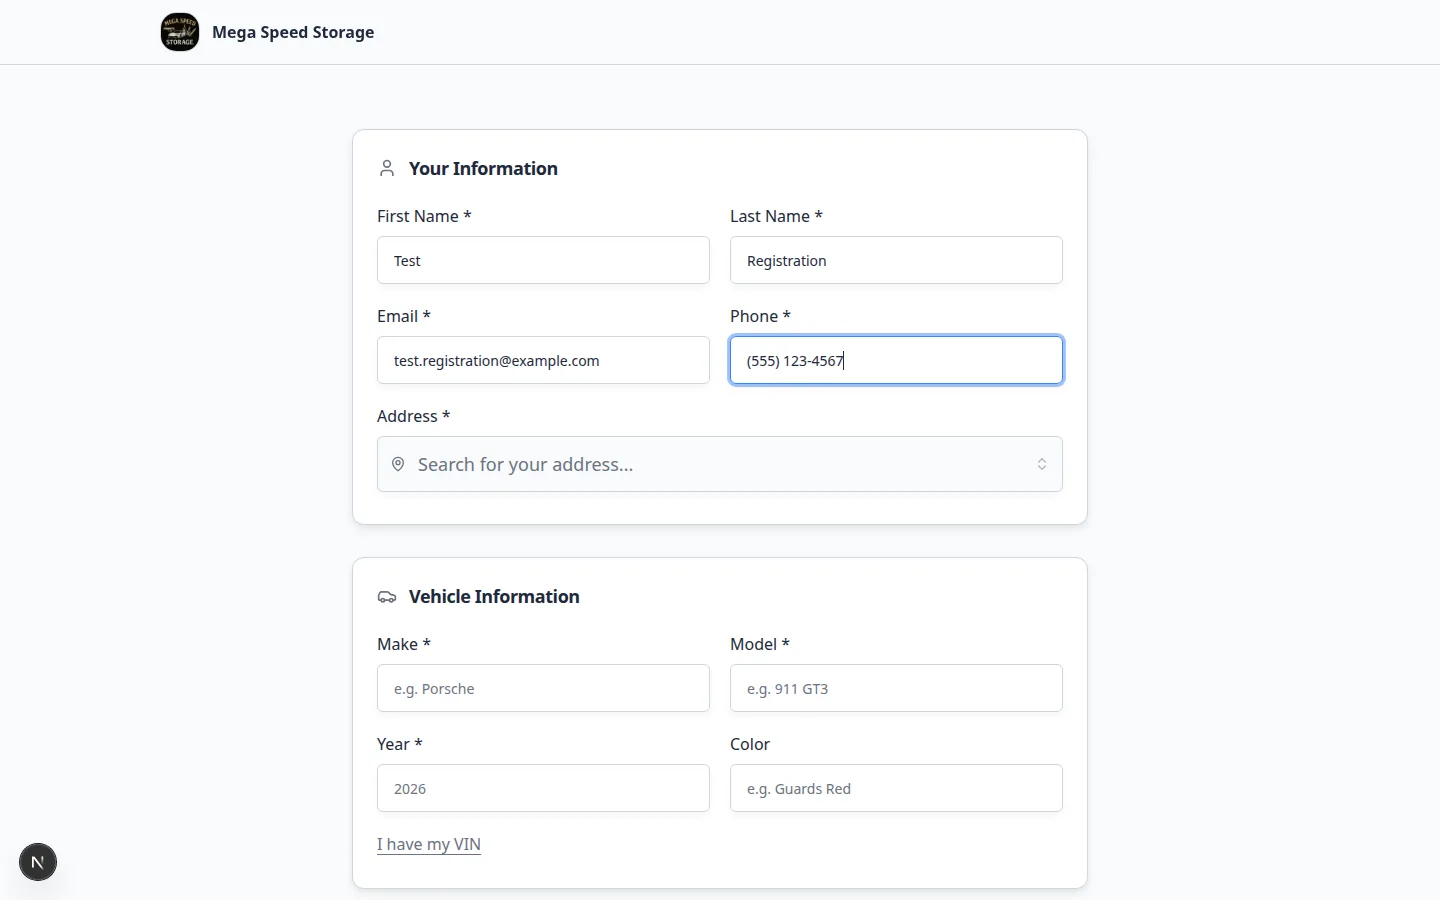
- Submit a test request
Use a clear test name such as Test Registration and an email your team will recognize.
Complete every required field and click through until you see a confirmation message.
- Find the test in Contacts
Sign in to the staff dashboard and open Contacts.
Search for your test name or email.
Expected result: The new record appears so your team can practice review steps in Review and approve registration requests.
Step 6: Review payment rules (optional)
If your form includes a Payment card, confirm your billing setup is ready.
- Payment processing is connected in Settings > Billing.
- Your team can explain what the customer is paying for if payment is required during signup.
- You tested a safe payment path using your facility’s approved test process.
What success looks like
- Online registration form is turned on in Customer onboarding.
- Form cards match the information your team needs at first contact.
- The registration link opens from Shareable links and works in a private browser window.
- A test submission appears in Contacts.
- Your team tested the full path before sharing the link publicly.
Troubleshooting
What to do next
After registration works, follow Review and approve registration requests with your team. Then add the link to your public facility page or website using Add a website embed.