Contacts
Understand portal access levels
Learn the difference between Full and Ticket-only portal access, when each applies, and how to help customers sign in.
What you will accomplish
You will understand what Portal Access means on your customer list, why some people have Ticket-only access, and what your team can (and cannot) change after a customer signs in.
This helps you set correct expectations when customers ask, "Why can't I see my cars?" or "I only see my event ticket."
Before you start
- You can open All Contacts in the dashboard.
- You know the customer's name or email so you can find their row quickly.
- Optional: open the Customer Report if you need to review many customers at once.
Two portal access levels
Most storage and service customers should have Full portal access. They can use the main areas your team enabled—typically Cars, Billing, Documents, Events, and Settings—depending on Settings > Website & customer app.
Some customers receive Ticket-only access automatically. They can use a limited portal experience tied to a specific event or marketplace flow—not the full storage customer dashboard.
| Level | What the customer usually sees | Common examples |
|---|---|---|
| Full | The normal customer portal your facility configured | Storage customers, detailing clients, long-term members |
| Ticket-only | A narrower experience (often event RSVP, ticket, or marketplace interest) | Social event guests, marketplace leads who are not full storage customers yet |
Where to see portal access in the dashboard
- Open All Contacts
Go to All Contacts.
Expected result: You see your customer table with a search bar near the top.
- Show the Portal Access column
Open Filters & Settings, make sure you are in Table view, and turn on the Portal Access column if it is hidden.
Expected result: Each row shows Full or Ticket-only in the Portal Access column.
- Read Account Status on the same row
Use Account Status to see portal sign-in progress: Not signed in yet, Email Sent, or Signed In.
Why this matters: Access level tells you what they can use after sign-in. Account status tells you whether they have signed in yet. You need both to answer portal questions on the phone.
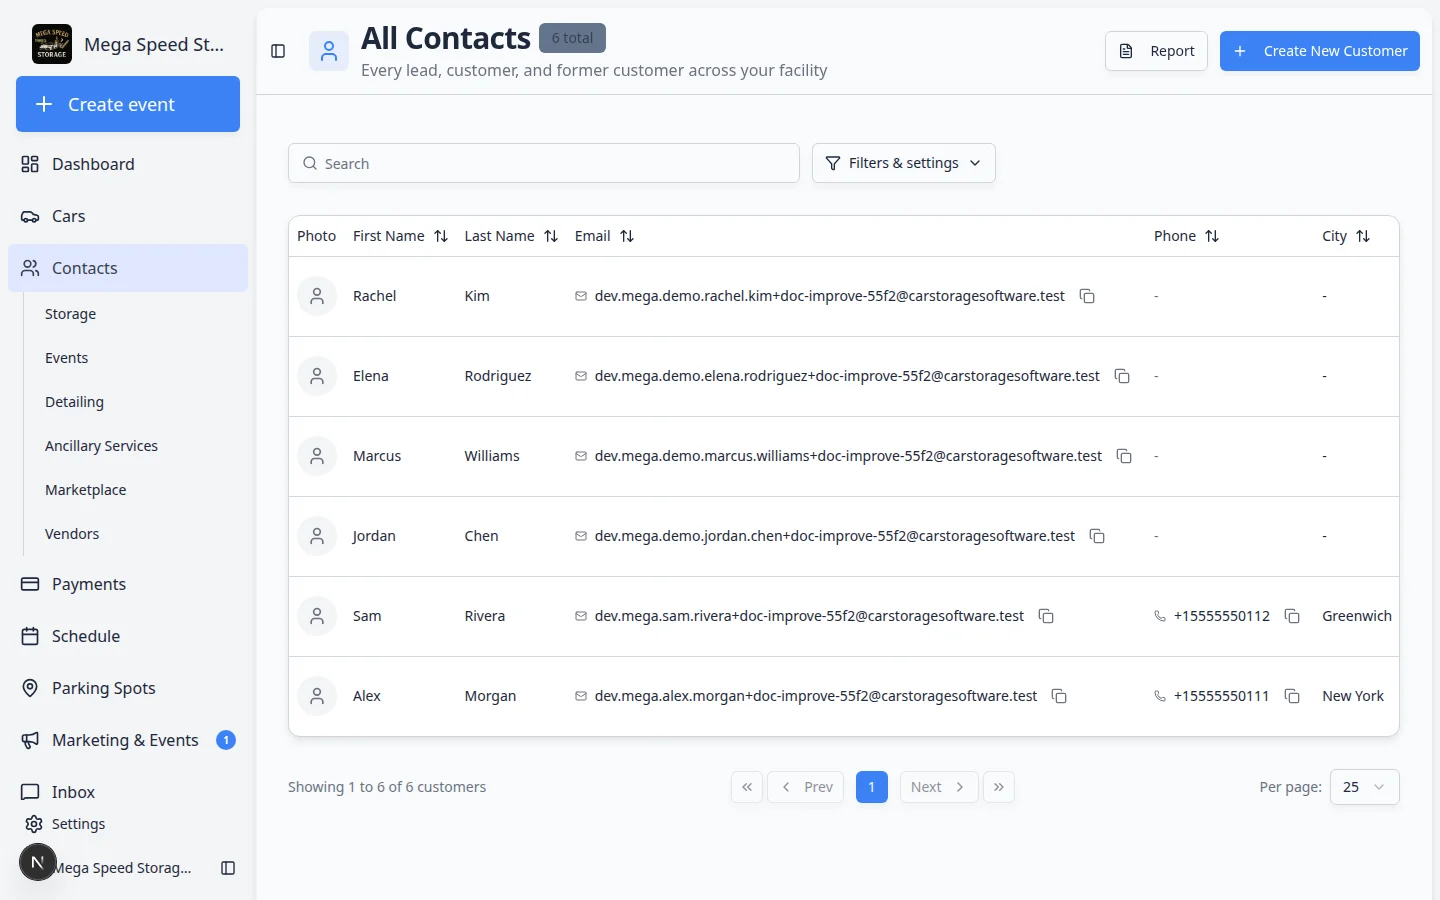
For a facility-wide view, open the Customer Report and enable the Portal Access and Account Status columns.
Send Invite and Resend Invite from the list
- When the button appears
On All Contacts, Send Invite or Resend Invite appears on a row when the customer has an email address and has not completed first sign-in (Signed In).
Expected result: You can send or resend the magic-link email from the list in one click.
- After the customer signs in
Once Account Status shows Signed In, the invite button on that row goes away. The customer can request a new sign-in link themselves from your facility login page by entering their email.
Why this matters: After first sign-in, resending from the staff list is usually not needed—the customer uses the same email on the public login page.
- If they still need help
Walk them through Guide a customer through the portal or confirm they are using the email on their customer record.
Additional contacts (spouse, assistant)
People listed under Contacts on a customer detail page can have their own portal access.
- Open the main customer's record
Find the storage customer on All Contacts and open their detail page.
- Scroll to Contacts and edit the person
In the Contacts section, find the spouse, assistant, or other person who needs their own sign-in. Click Edit on their row.
Expected result: An Edit Contact window opens.
- Turn on portal access
Enable Can access customer portal (login with their email) and save a valid email address that belongs to that person.
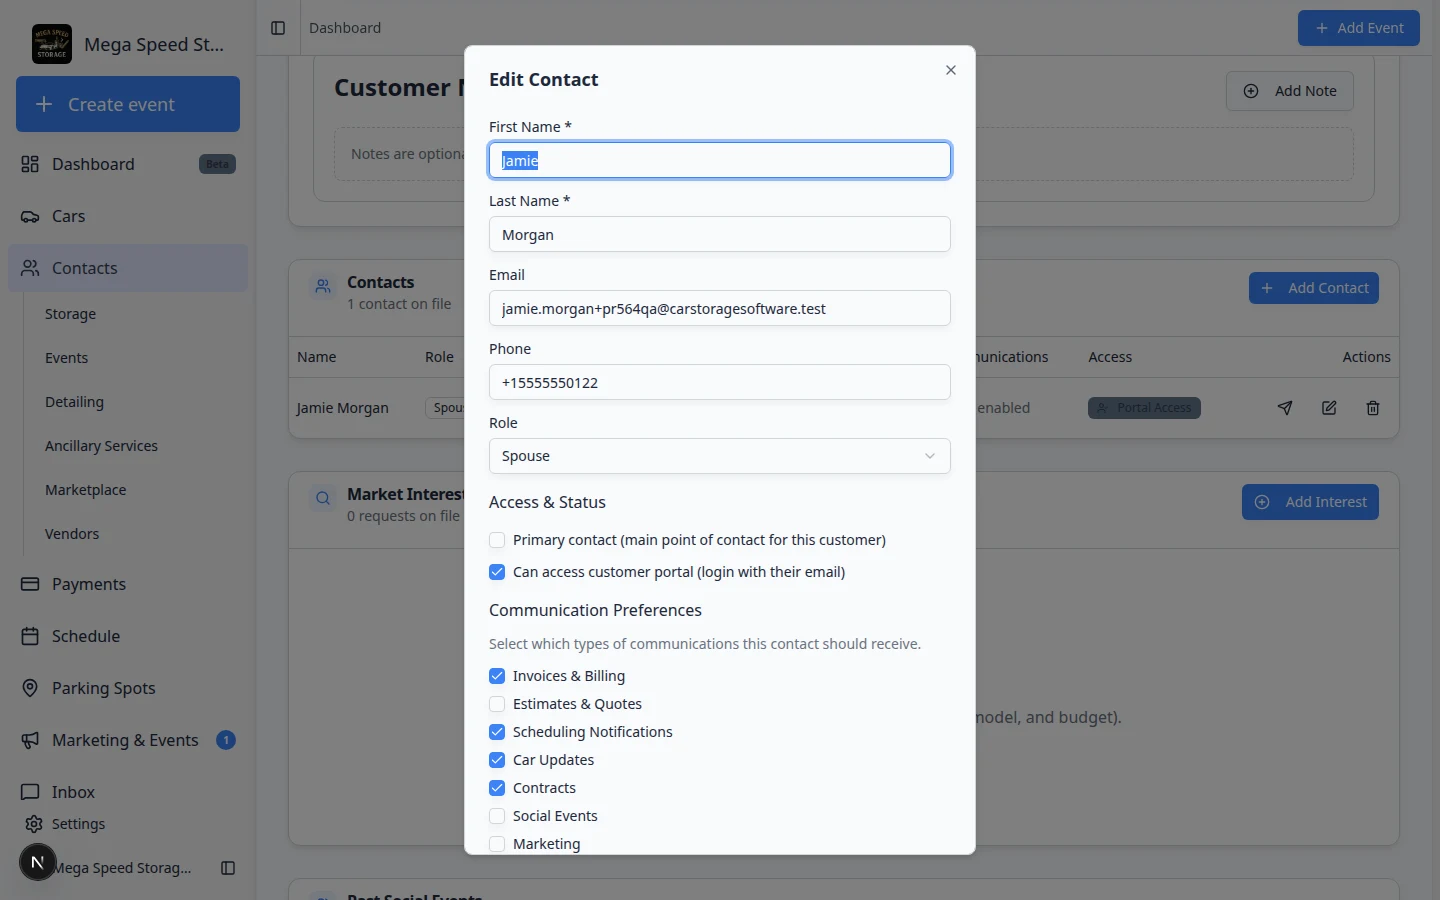
Additional contacts need their own email and the portal access checkbox before they receive a separate invite. Why this matters: Each person signs in with their own email but sees the same cars and billing tied to the main account.
- Send their invite
Use Send Invite on that contact's row. See Manage additional contacts for the full steps.
What your team cannot do from the customer page
To pause a relationship while keeping history, use the Active / Inactive switch in CRM Information on the customer detail page. See Edit customer details.
Phone support: diagnose portal problems in order
When a customer calls about the portal, walk through these steps in order. Stop when you find the answer:
- Confirm you have the right customer record
Search All Contacts by email—the same email they are trying to sign in with.
If no match: They may be using a personal email that is not on the record. Update the email or add an additional contact.
- Check Portal Access
Read the Portal Access column.
- Ticket-only: Explain they have event or marketplace access today—not the full storage dashboard. Set expectations for what they can see.
- Full: Continue to the next step.
- Check Account Status
- Not signed in yet or Email Sent: Send or resend the invite from the row, or walk them through your facility login page.
- Signed In: They have signed in before—the issue is likely what is linked to their record, not the invite.
- Check what is linked to the record
Open the customer detail page. Confirm Cars, Documents, and Billing are set up if the customer expects to see them.
Why this matters: A Full customer with nothing linked may sign in successfully but see empty sections.
Troubleshooting
What to do next
- First-time portal setup: Invite a customer to the portal
- Phone support script: Guide a customer through the portal
- Export portal and sign-in status: Export and use the customer report