Contracts
Create a contract template
Build a reusable agreement for storage, service, events, waivers, or onboarding.
What you will accomplish
You will upload a PDF agreement once and tell the app where customer names, vehicle details, dates, and signatures belong. After you save the template, your team can send the same agreement to many customers without rebuilding the PDF each time.
When to use this guide
Use this guide before you:
- Send contracts from a customer record.
- Require contracts during customer onboarding.
- Ask customers to sign storage, service, or waiver paperwork online.
Before you start
- Have the final PDF on your computer (Word files must be saved or exported as PDF first).
- Confirm the wording was reviewed by the right owner, manager, or legal advisor.
- Know what the agreement is for (storage, service, event, waiver).
- Mark on paper where the customer must sign, initial, or type information.
- Sign in as a team member who can manage Settings.
Step 1: Open Contracts & Documents settings
- Open Settings
In the left sidebar, click Settings.
- Open Contracts & Documents
Go to Settings > Contracts & Documents.
You will see two areas:
- Contract templates and e-sign for PDFs customers sign.
- Document types for uploads for files customers upload (covered in a separate guide).
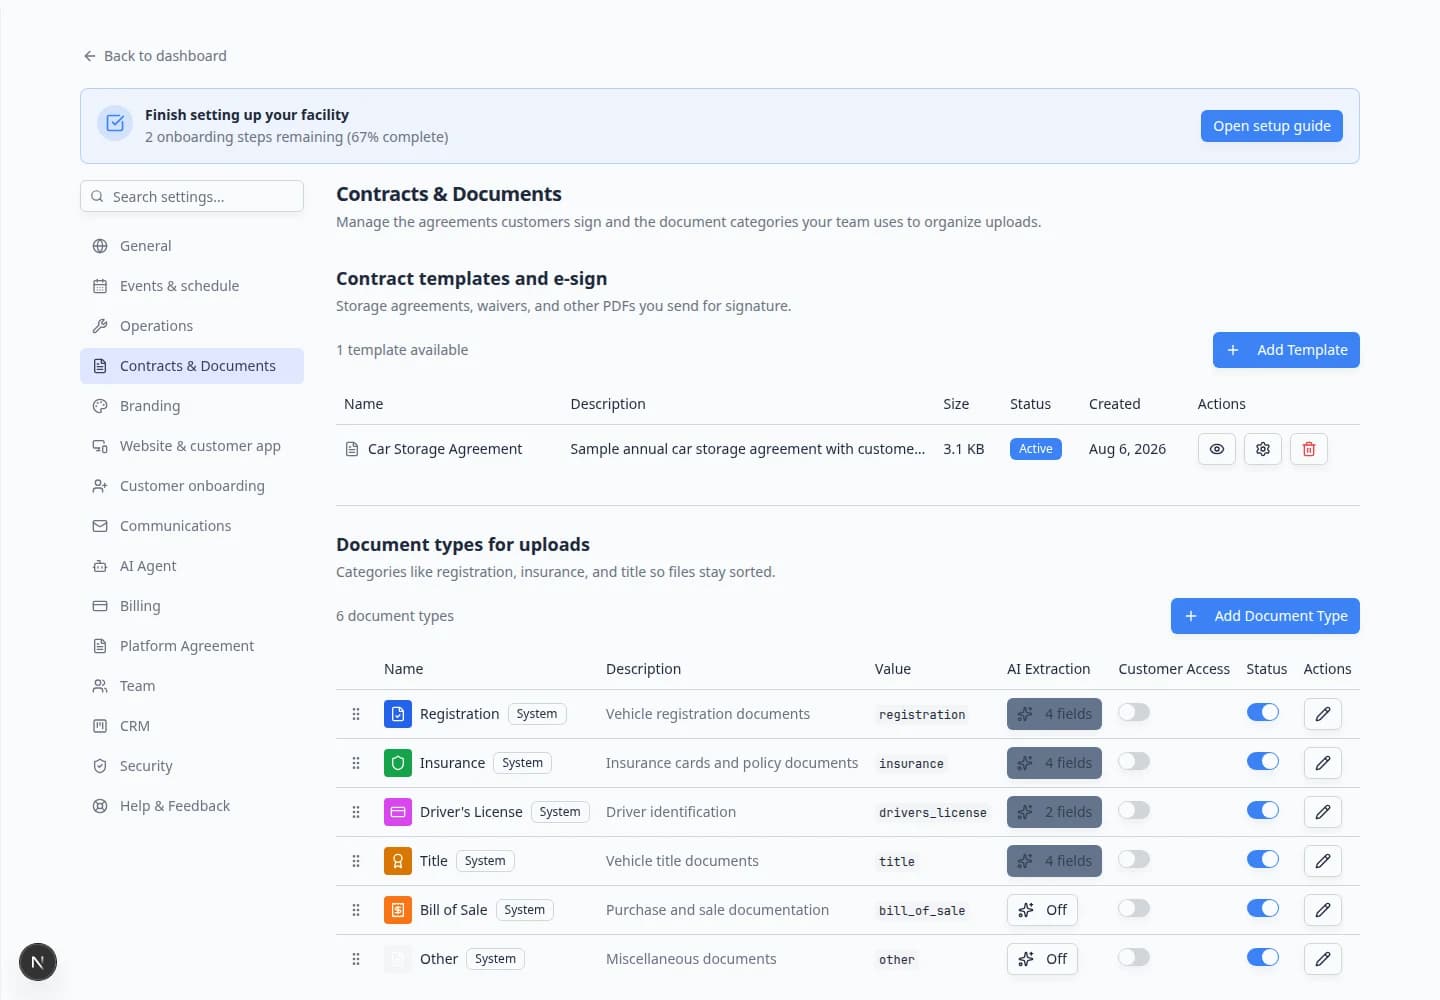
Expected result: You are on the page where templates are created and managed. You see how many templates and document types your facility already has.
Step 2: Start a new template
- Click Add Template
In Contract templates and e-sign, click Add Template in the top-right of that section.
If this is your first template, the button may say Create First Template instead.
Why this matters: Each template is one PDF agreement. You can have separate templates for storage, waivers, events, and other paperwork.
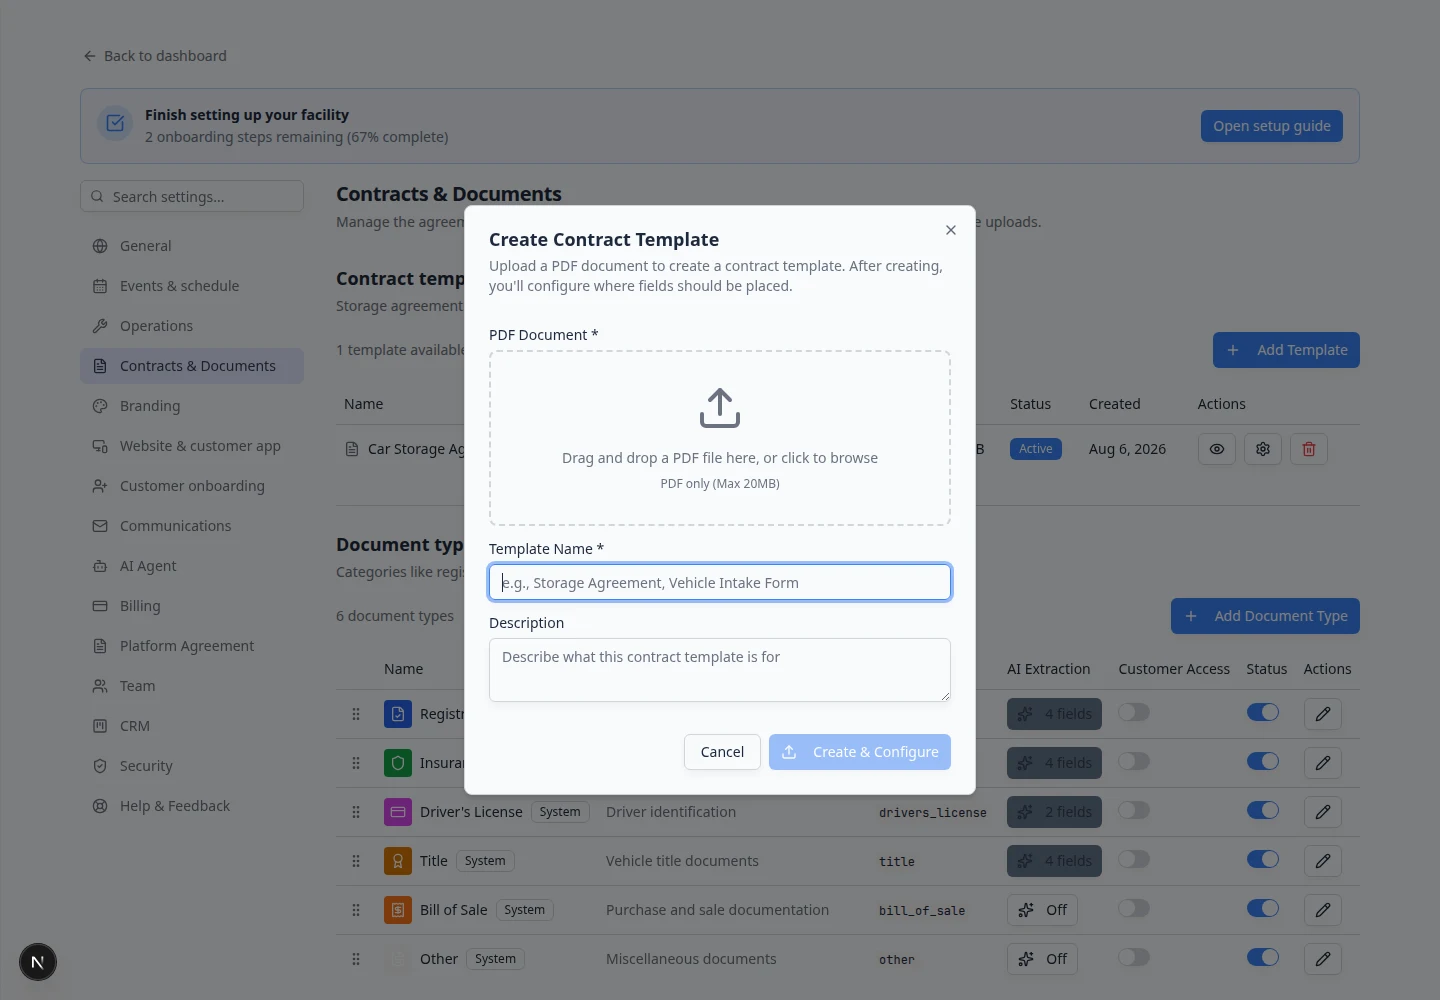
Step 3: Upload the PDF and name the template
- Open the upload area
In the Create Contract Template window, click the box that says Drag and drop a PDF file here, or click to browse.
- Choose your PDF
Select the agreement from your computer. The file must be a PDF and must be 20 MB or smaller.
- Name the template
Type a clear Name your team will recognize, such as Car Storage Agreement, Vehicle Storage Agreement, or Event Waiver.
- Add a short description (optional)
Explain when staff should use this template. Example: Use for all long-term collector vehicle storage customers.
- Click Create & Configure
Click Create & Configure at the bottom of the window.
The app saves the template and opens the field editor.
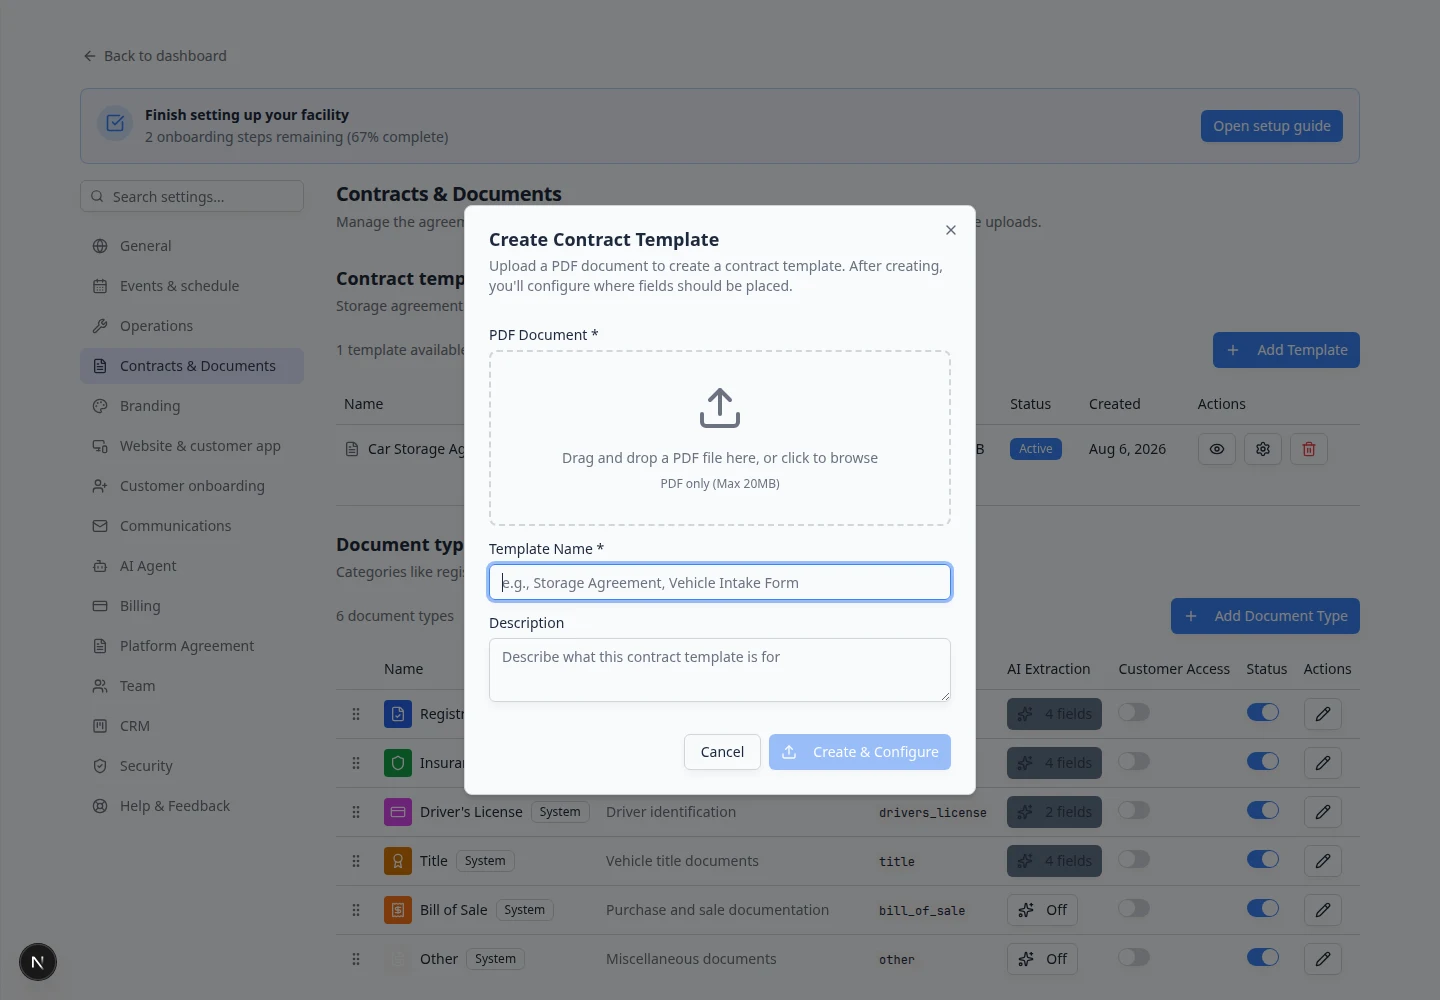
Expected result: The template is created and you are taken to the field setup screen.
Step 4: Place fields on the PDF
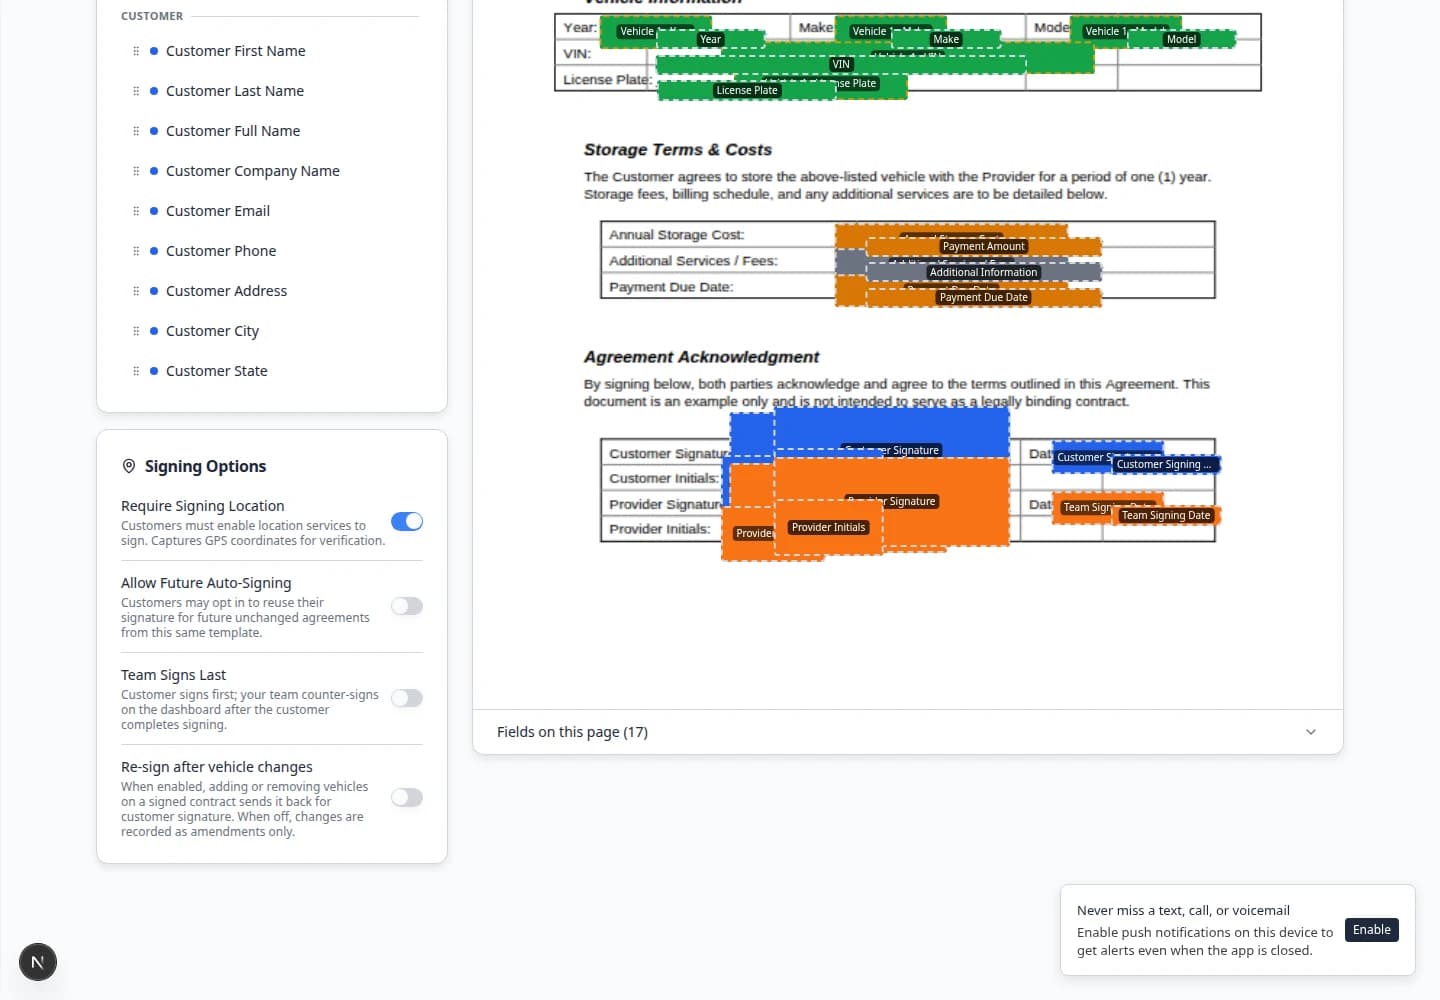
Fields tell the app what information to place on the agreement when someone signs.
- Open the template editor
After Create & Configure, you land on the template editor for your new template. You can return later from Settings > Contracts & Documents by clicking the settings (gear) icon on a template row—the tooltip reads Configure fields.
The editor opens at a page address like
/dashboard/settings/contracts/your-template-id. - Drag fields onto the PDF
From the side panel, drag each field type onto the correct place on the PDF preview.
Common fields:
- Customer Full Name — who is signing.
- Customer Email or Customer Phone — contact details on the agreement.
- Car Year, Car Make, Car Model, Car VIN — vehicle-specific agreements.
- Customer Signature and Customer Initial — where the customer signs or initials.
- Customer Signing Date — filled automatically with the date the customer signs.
- Team Signature / Team Signing Date — for facility counter-signatures when needed.
- Date — a generic date the team or signer can fill manually.
- Free Text or Checkbox — extra statements the signer must complete or agree to.
- Size each field
Make each box large enough for the text or signature. Small boxes cause cramped signatures and hard-to-read agreements.
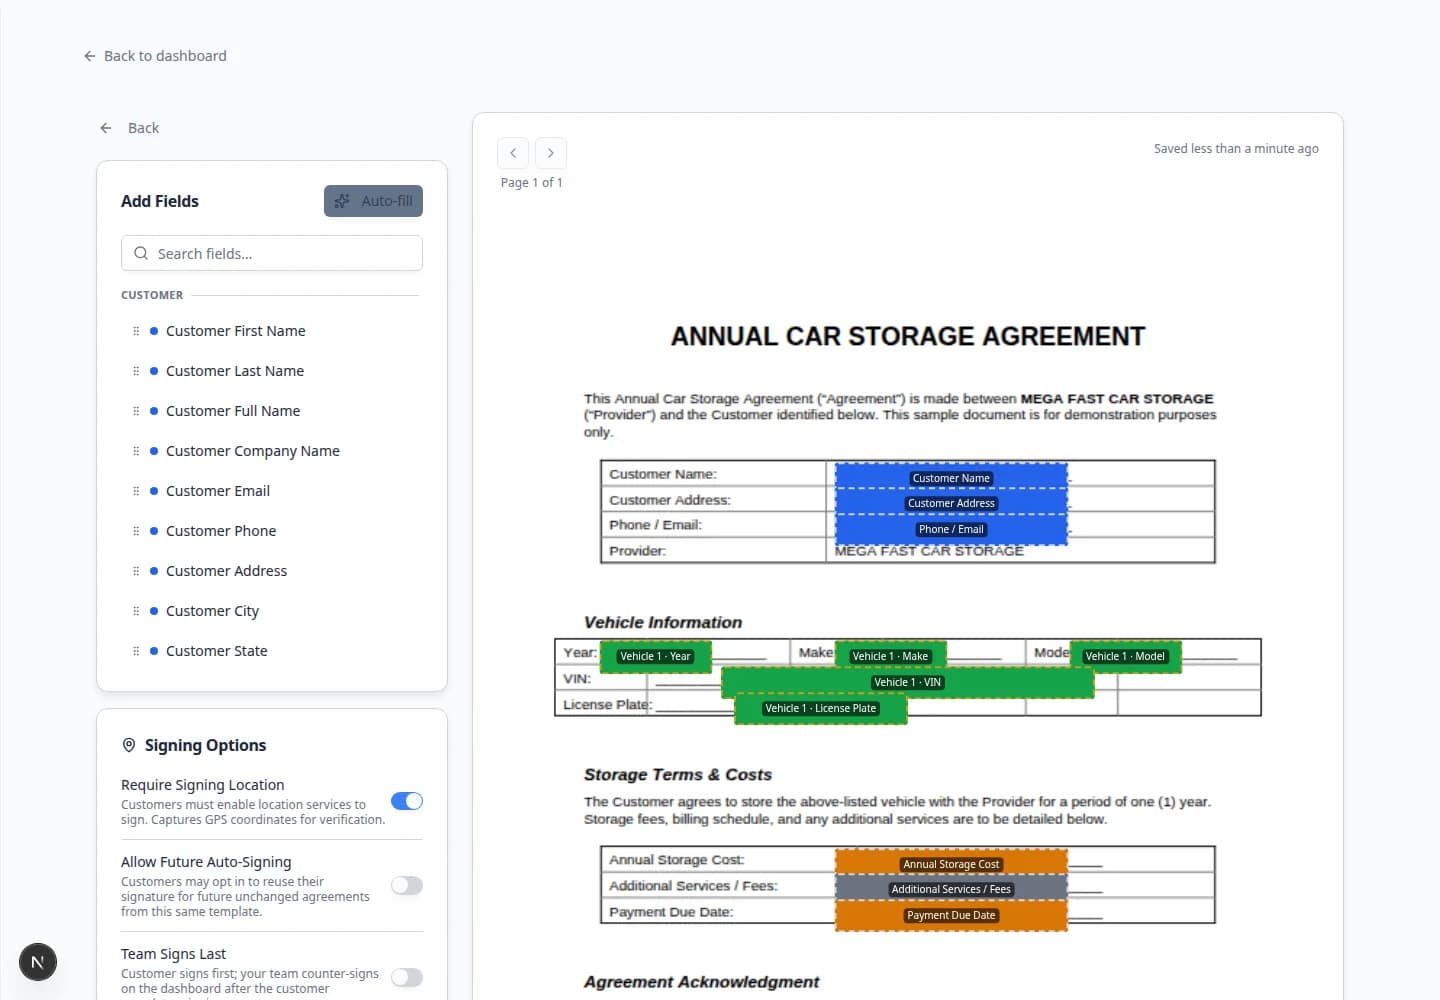
Expected result: The PDF shows clear boxes for names, vehicle details, dates, and signatures.
Step 5: Review each field's settings
Double-click a field on the PDF and check the Edit field dialog:
- Each signature and initial box is large enough to draw in.
- Vehicle fields (year, make, model, VIN) are on Team if they come from the car record automatically.
- Customer signature and initials are on Signer.
- Provider or facility signature lines are on Team.
Step 6: Choose signing options (if needed)
Scroll to Signing Options in the template editor before using the template with real customers.
- Required — turn on when every active customer should have a current signed copy of this agreement. Missing and expired copies show on the dashboard and in Contacts.
- Valid for — choose how long a signed copy stays current: 3, 6, 12, or 24 months from the signing date, a specific date such as January 1, or Does not expire. A specific date applies to every signed copy of this template, so update it when you renew for the next year.
- Team signs last — turn on when the customer signs first and a facility team member counter-signs afterward. Status will show Awaiting team signature until staff finish. Use Counter-signers to pick which team members may complete that signature; any selected person can sign. If you leave it on Primary team admin, only that first admin can sign. See Counter-sign after the customer.
- Require Signing Location — turn on only if your facility needs location verification when the customer signs. Customers see a browser location prompt on the signing page.
- Allow Future Auto-Signing — turn on only when the same agreement text will be reused for future vehicles and customers may opt in during signing. See the section below.
Future auto-signing (use carefully)
Future auto-signing lets a customer authorize the same template to be signed again for future vehicles without signing a brand-new copy every time.
Step 7: Your field layout saves automatically
- Wait for automatic save
The template editor saves your work automatically as you drag fields and change settings. Near the top of the page, watch for Saved or All changes saved.
Expected result: Your field boxes stay on the PDF when you leave and come back—no separate Save button is required.
- Return to the template list (optional)
Click Back or open Settings > Contracts & Documents again. Your template should show in the list with an Active status.
Step 8: Test before going live
- Pick a test customer
Open a customer you can experiment with in Contacts. Use their real email only if you are comfortable receiving test messages—or use a test address you control.
- Send a test contract
On that customer record, open Documents & Contracts, click New Document, choose Contract, pick your template, then walk through the three-step send screen (Setup → Fields → Review). Full steps are in Send a contract for signature.
Expected result: A contract card appears with status Sent (or Draft if you have not clicked Send to customer yet).
- Open the signing link
Open the email link yourself, or sign in as the test customer in the portal if the contract is part of onboarding.
Walk through every page, signature, and initials field.
Expected result: Status on the customer record becomes Completed and you can download a signed PDF.
Edit or retire a template later
Templates are not "set once and forgotten." When your legal wording changes:
- Open Contracts & Documents
- Configure or upload a new PDF
For small field moves, click Configure on the existing template. For a new legal version, upload a new template with a clear name (for example Car Storage Agreement — 2026).
Why this matters: Future auto-signing and customer authorizations apply to one template at a time. A new PDF is a new template.
- Turn off old templates
Set outdated templates to Inactive so staff do not send the wrong agreement by mistake. Old signed contracts stay on customer records for history.
What success looks like
- The template appears in Settings > Contracts & Documents.
- You can open the template from the list and see fields on the PDF.
- A test signing link opens, shows the correct vehicle and customer details, and completes with Signed or Completed on the customer record.
Troubleshooting
What to do next
If customers must upload supporting files, continue with Configure document requirements.
If every new customer should sign during onboarding, continue with Attach contracts to customer workflows.