Facility Web Pages
Set up the vendor invoice portal
Let vendors submit invoices through a public facility link, then review those invoices in the staff dashboard.
What you will accomplish
Outside providers will use one public link to submit invoices with an uploaded file. Your team will review those submissions in Payments > Invoices without giving vendors access to the staff dashboard.
When to use this guide
Use this guide when detailers, transport companies, mechanics, photographers, or other vendors need a simple way to send invoices to your facility.
This is not the same as a customer invoice (a bill your facility sends to a customer). Vendors use the public portal to send bills to you.
Before you start
- Public Facility Pages is turned on in Settings > Website & customer app.
- You know which vendors should receive the invoice link (email, contract packet, or onboarding note).
- Your team knows who reviews vendor invoices before payment.
- Your team has a simple approval rule (for example, “Invoices over $500 need a manager”).
Step 1: Turn on the vendor invoice portal
- Open Website & customer app
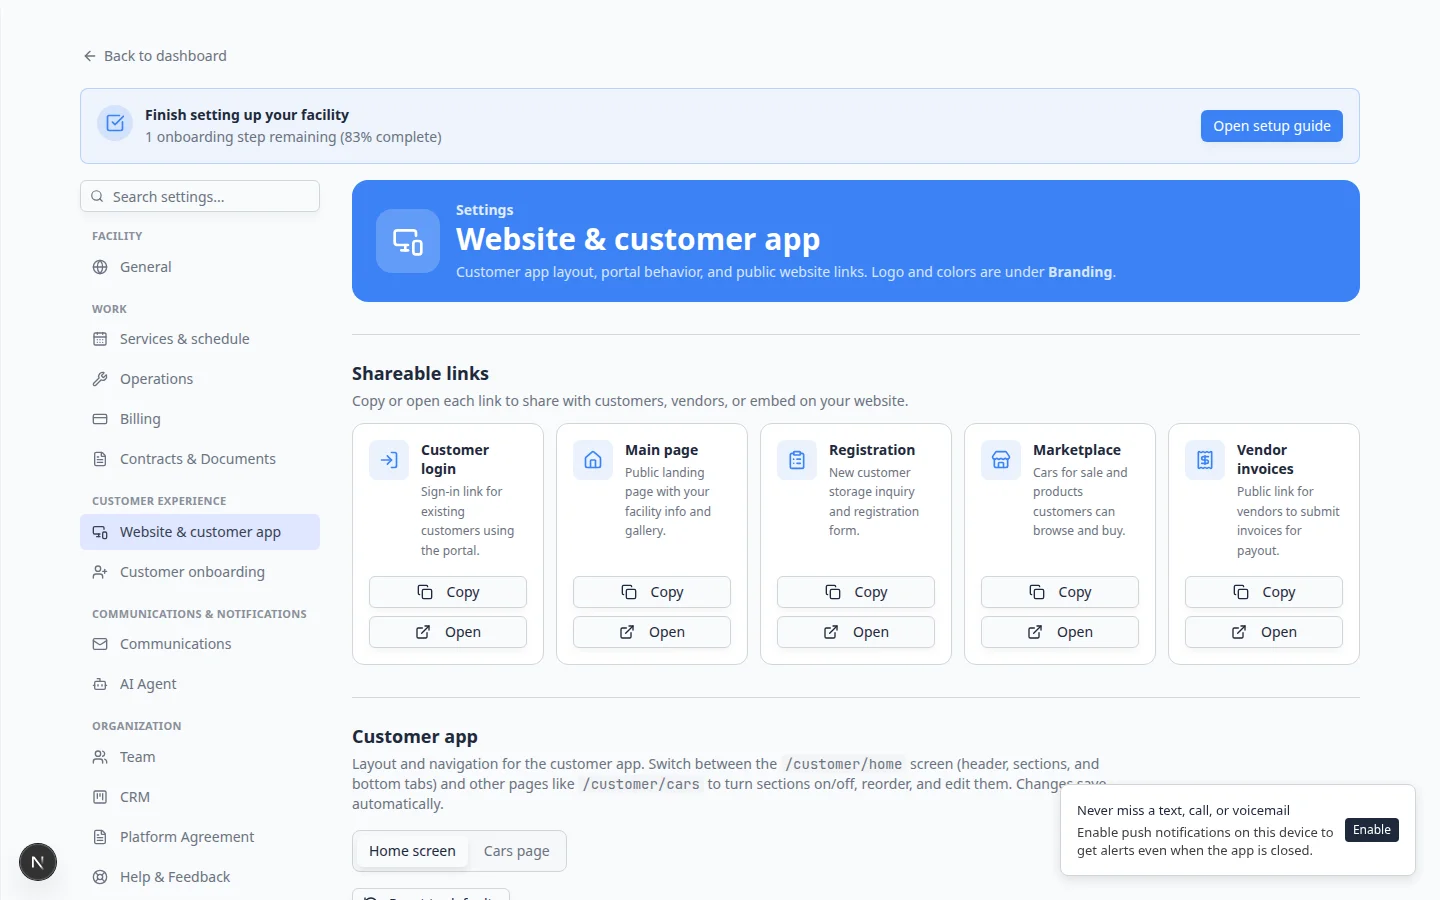
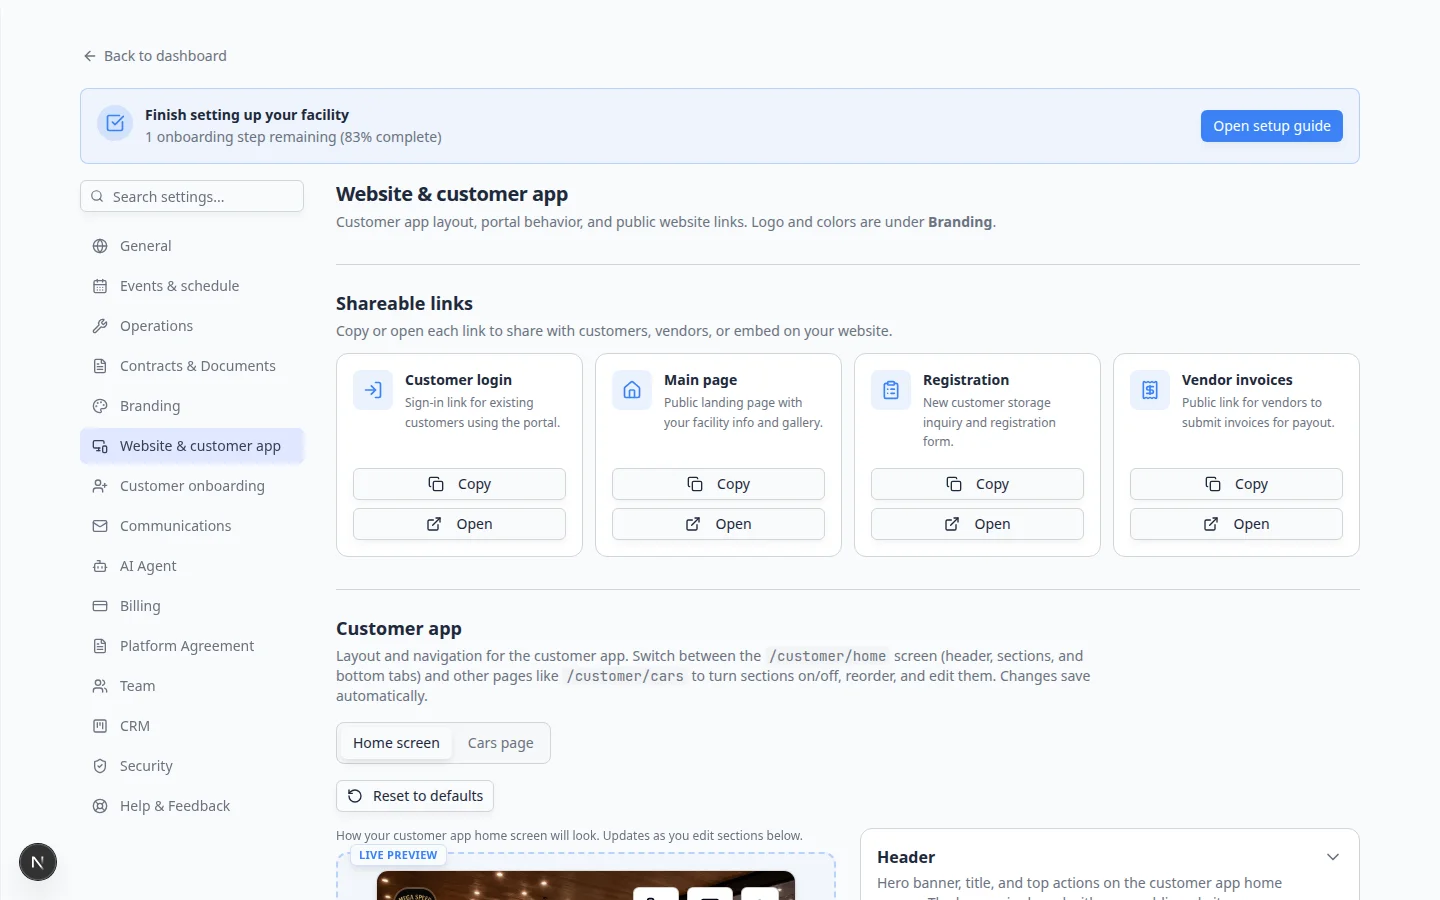
Go to Settings > Website & customer app.
Expected result: You see Public website with a live preview and Page editor.
- Confirm Public Facility Pages is on
Turn on Public Facility Pages if it is not already on. Vendors need a working public address for your facility before the invoice link will work.
If you are not sure which links are public yet, read Choose the right public link to share.
- Turn on Vendor invoice portal
In the Page editor, expand Header & page settings (at the top of the editor—not in the draggable section list). Find Vendor invoice portal and turn its switch on.
Expected result: Vendor invoices appears in Shareable links at the top of the page.
Step 2: Copy and test the vendor link
- Copy the Vendor invoices link
Near the top of the page, find Shareable links. Click Copy on the Vendor invoices card.
The address usually looks like:
/facility/your-facility-name/invoicesWhy this matters: Vendors should not use a staff dashboard link. They only need this public form.
- Open the link in a private window
Paste the link in a private browser window where you are not signed in as staff.
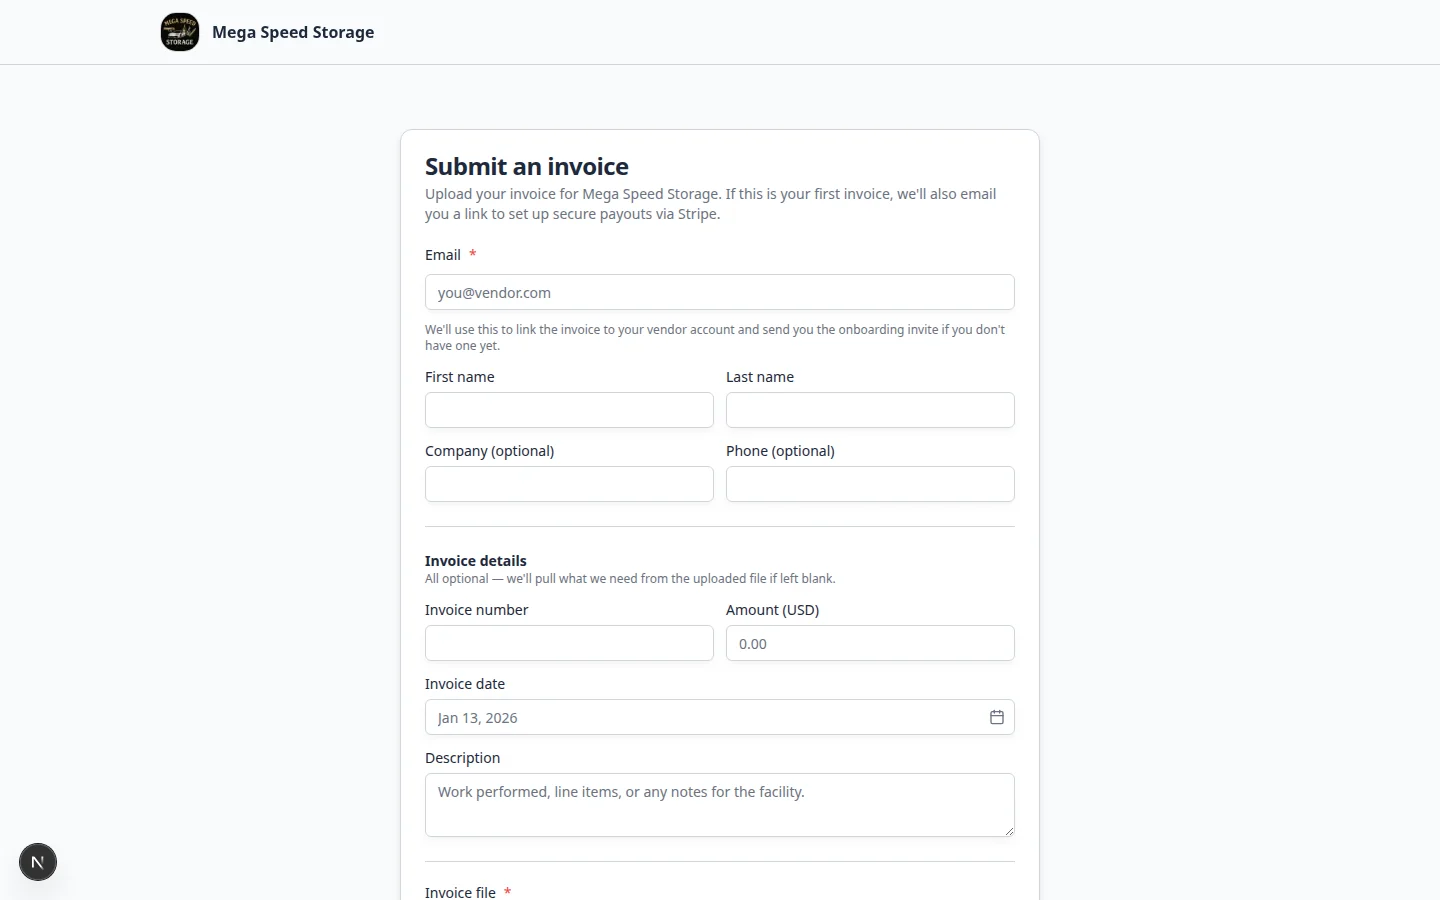
Expected result: You see a public form with your facility name—not the staff dashboard.
Step 3: Review the form like a vendor
Walk through the form as if you are the vendor. The form asks for:
- First name and Last name
- Company (optional)
- Phone (optional)
- Email (required)
- Invoice number
- Amount (USD)
- Invoice date
- Description — short note about the work
- Invoice file — PDF or image upload (required, up to 25 MB)
- Instant payout (optional) — vendor can request faster payment with a 5% fee
Step 4: Send the link to vendors
Send the copied link with a short message. Keep it simple—vendors do not need to know how your dashboard works.
Please submit future invoices through this link: [paste your vendor invoice link].
Include your invoice number, amount, invoice date, and attach your invoice PDF. This helps our team review and pay on time.
Expected result: Vendors know they should use this link every time instead of only emailing accounts payable.
Step 5: Review submissions in Payments
After a vendor submits an invoice, your team works in the dashboard.
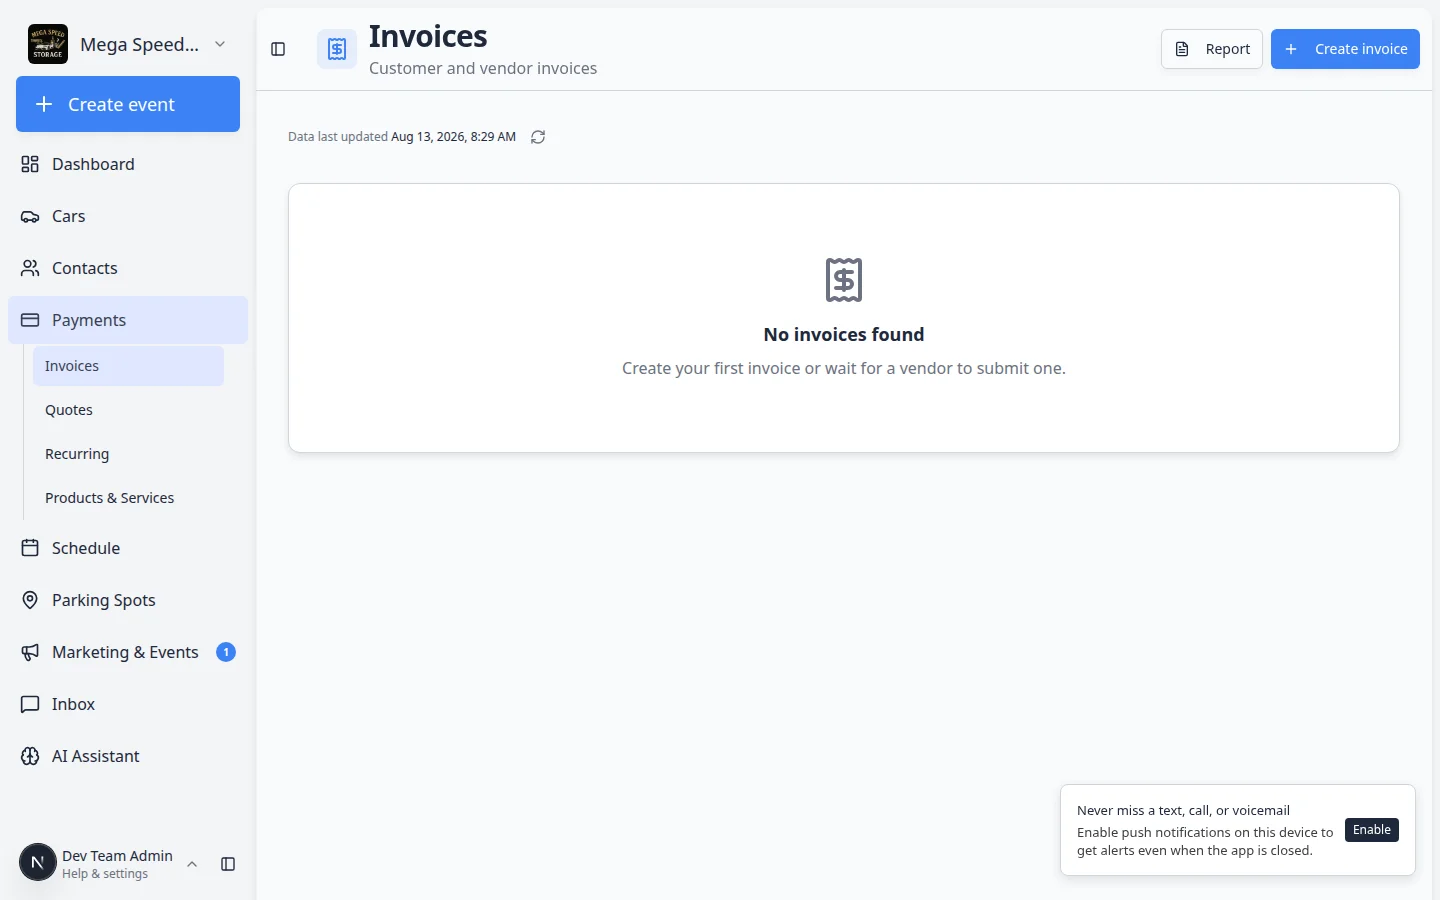
- Open Payments > Invoices
Go to Payments > Invoices.
- Choose the Vendor tab
Near the top of the page, click Vendor so the list shows vendor invoices only.
You can also open Payments > Invoices (vendor filter) directly.
Expected result: You see vendor submissions, not customer invoices you sent.
- Open the invoice row
Click the invoice to review vendor name, amount, invoice date, description, and the uploaded file.
Expected result: You can decide whether to approve, pay, or ask the vendor for corrections.
When you review each submission, check:
- Vendor name and email match someone you recognize
- Invoice number and amount match the uploaded file
- Invoice date fits your payment process
- The uploaded file opens and is readable
- The vendor is linked to an existing vendor record when possible (Payments > Vendors)
For the full payment workflow, follow Review and pay vendor invoices.
Step 6: Update status after your team acts
After approval or payment, update the vendor invoice record in the dashboard.
- Open the vendor invoice
From the Vendor tab, click the invoice row to open its detail page.
- Change the status
Use the status control to mark the invoice as approved, paid, or Rejected if you are declining it.
Why this matters: Updated status prevents two people from reviewing the same invoice or paying twice.
- Add a note if needed
Leave a short note when you reject an invoice or ask the vendor to resubmit.
Common statuses your team may see:
- Submitted — just arrived from the portal
- Under review — someone is checking the file
- Approved — ready for payment
- Paid — payment completed
- Rejected — sent back or declined with a note
What success looks like
- Vendor invoice portal is on only when your team is ready to monitor submissions.
- Each vendor has one clear link and simple instructions.
- Submissions appear on the Vendor tab in Payments > Invoices.
- Staff open the uploaded file before approving payment.
- Invoice status is updated so everyone sees what happened.
Troubleshooting
What to do next
- Manage vendors so vendor records stay organized
- Review and pay vendor invoices for the full staff workflow
- Choose the right public link to share when you send links to other audiences