Contracts
Attach contracts to customer workflows
Require the right agreements during customer onboarding or customer setup.
What you will accomplish
You will connect a contract template to customer onboarding so new portal customers are asked to sign the right agreement as part of their first login—not only when staff sends a one-off email.
When this works, customers complete cars, uploads, and signing in a sensible order, and your team can confirm the signed PDF on the customer record.
When to use this guide
Use this guide when:
- Every new storage customer must sign the same storage agreement.
- Customers should sign before they finish portal setup.
- Your agreement uses vehicle fields and customers may need to add a car first.
- You have already created and tested a contract template.
Before you start
- Complete Create a contract template.
- Place required signature, initials, customer, and car fields on the template.
- If uploads are required, complete Configure document requirements.
- Sign in as a team member who can manage Settings.
Step 1: Confirm the template is ready
- Open Contracts & Documents
- Check the template list
Confirm your agreement appears and is Active. Only ready templates should be connected to onboarding.
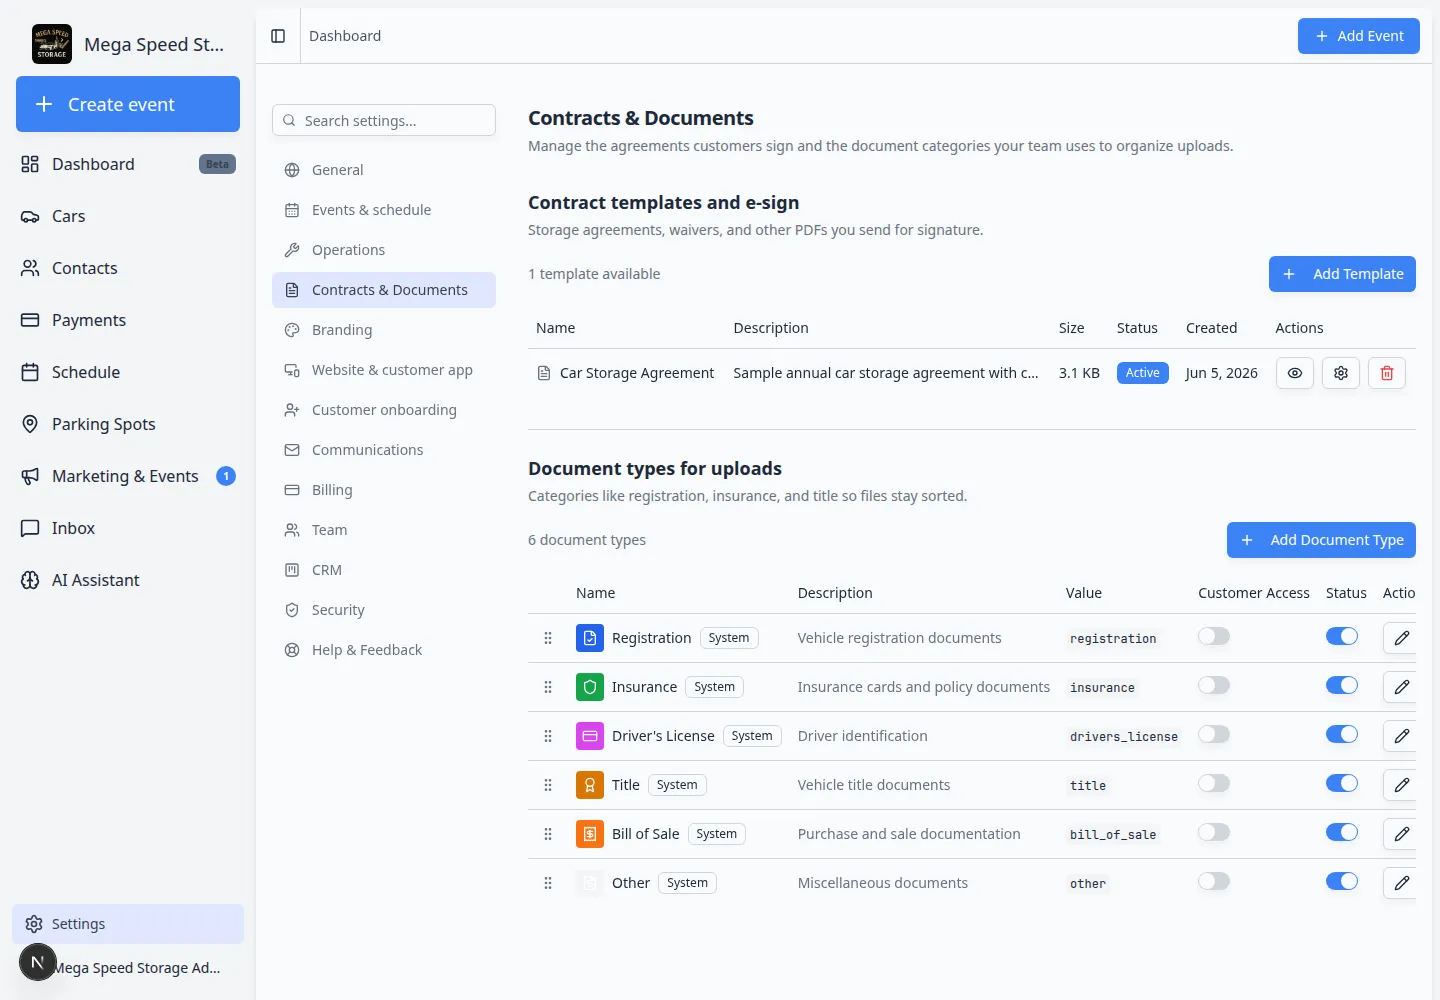
Expected result: Your team has at least one active template to select in onboarding settings.
Step 2: Choose manual send vs onboarding
Customer onboarding is best when every new customer should sign the same agreement during portal setup.
Manual send from a customer record is best when only some customers need the agreement or staff must review each case first.
This guide covers onboarding. For one customer at a time, use Send a contract for signature.
Step 3: Turn on Contract Signing in onboarding
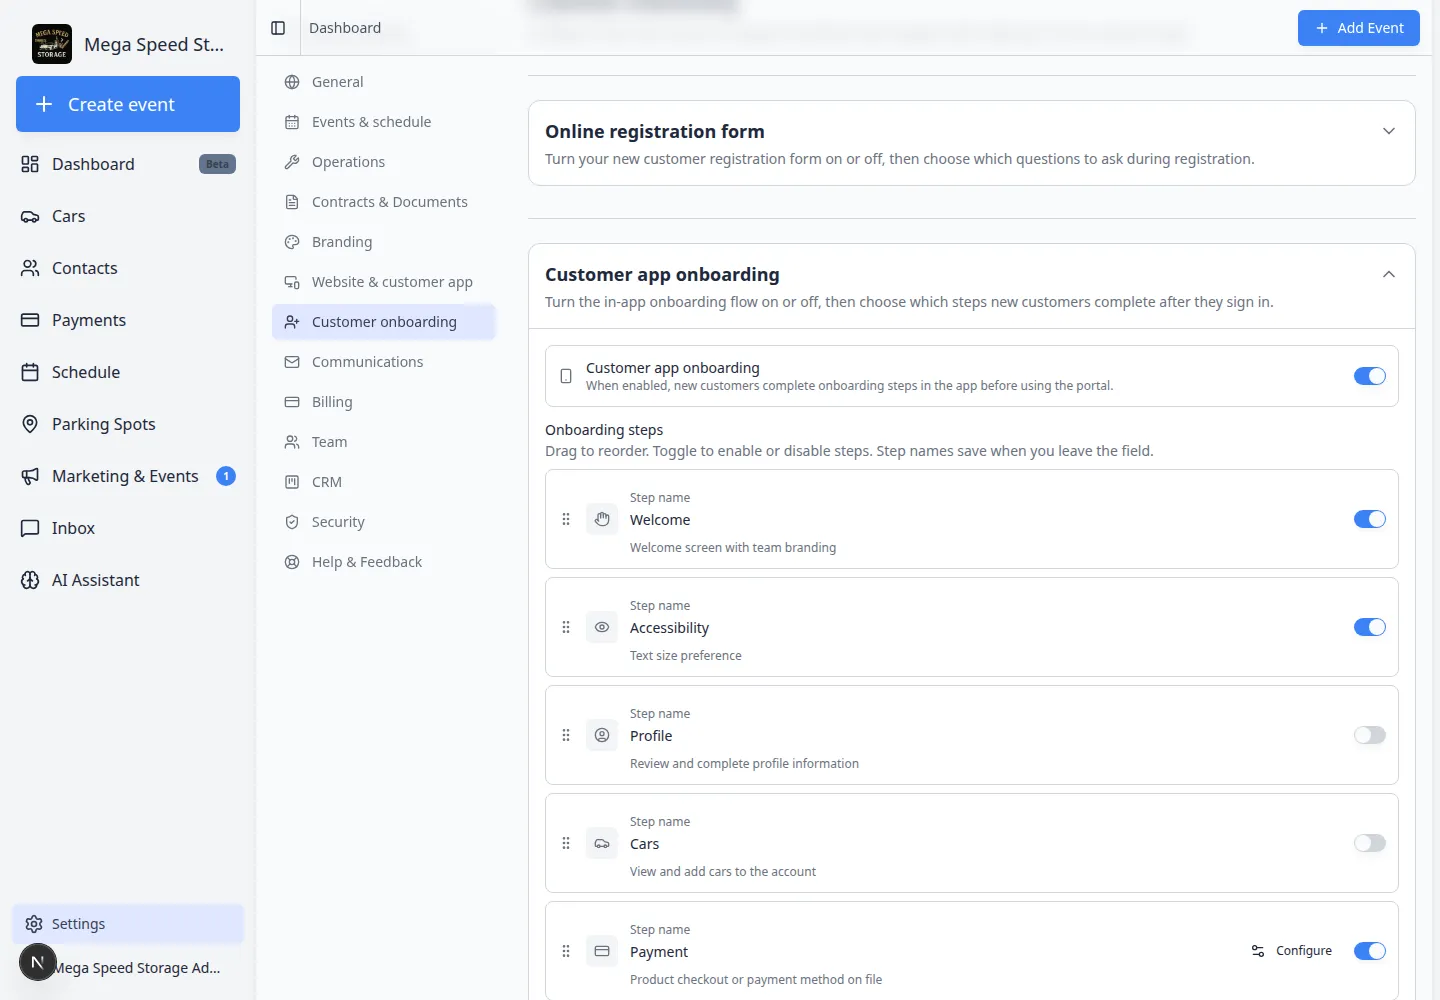
- Open Customer onboarding
- Expand Customer app onboarding
Click Customer app onboarding to expand the section if it is collapsed.
Turn the main Customer app onboarding switch on if it is off. Until this switch is on, step settings stay hidden.
- Scroll to Onboarding steps
Find the Onboarding steps list below the switch.
- Enable Contract Signing
Find the step named Contract Signing and turn its switch on (the switch should show as enabled, often blue or highlighted).
Expected result: The Contract Signing row stays on and shows a Configure button next to it.
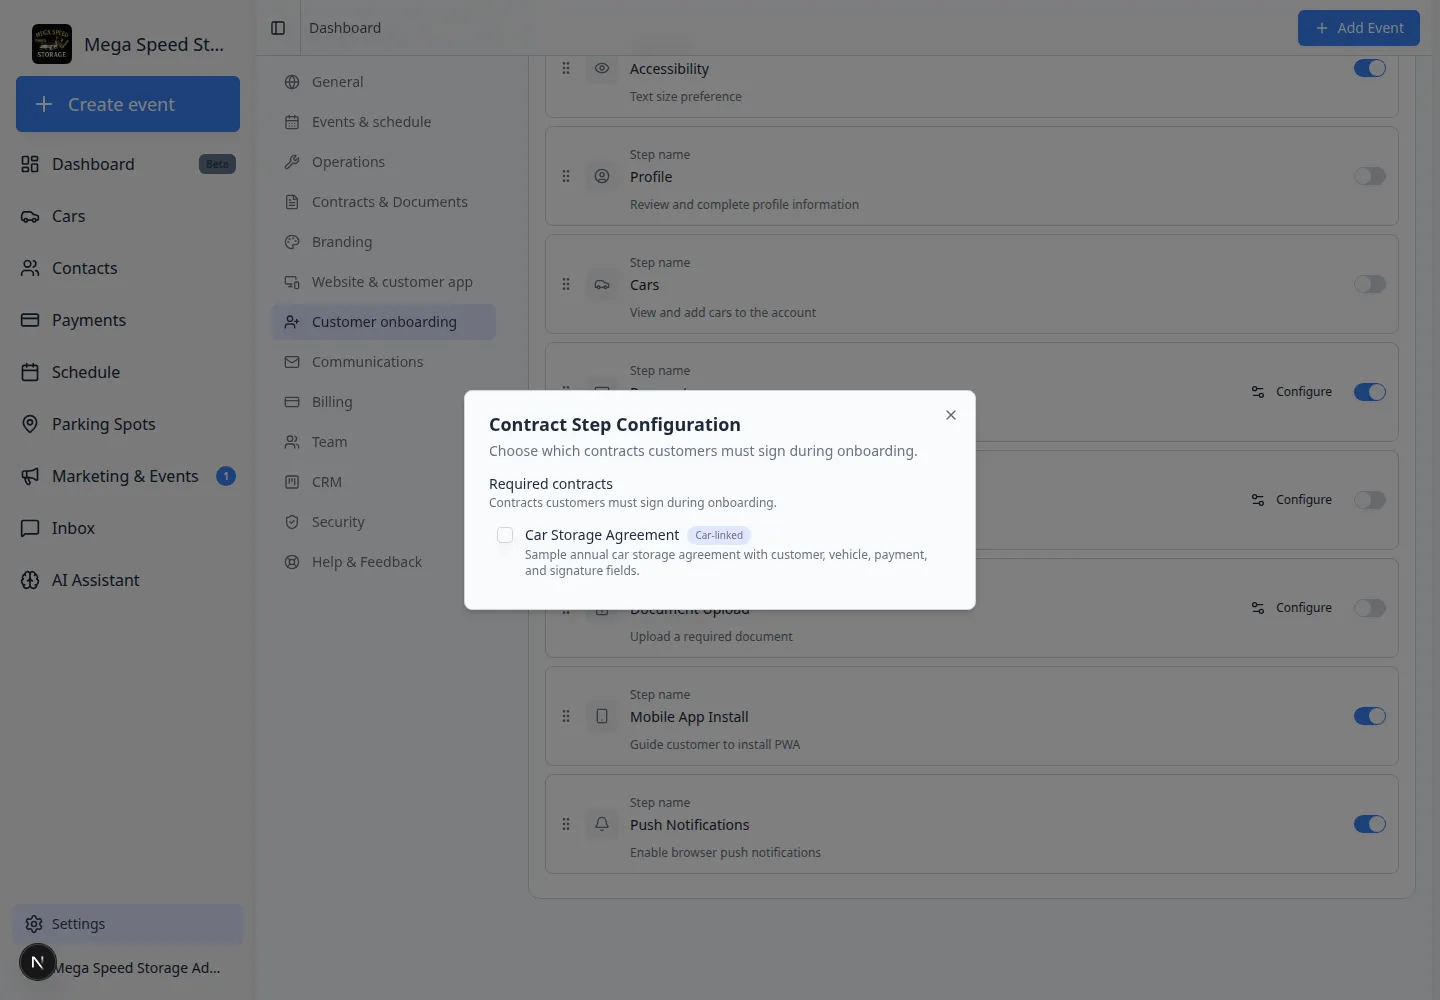
- Click Configure
Next to Contract Signing, click Configure.
A panel titled Contract Step Configuration opens.
- Select required templates
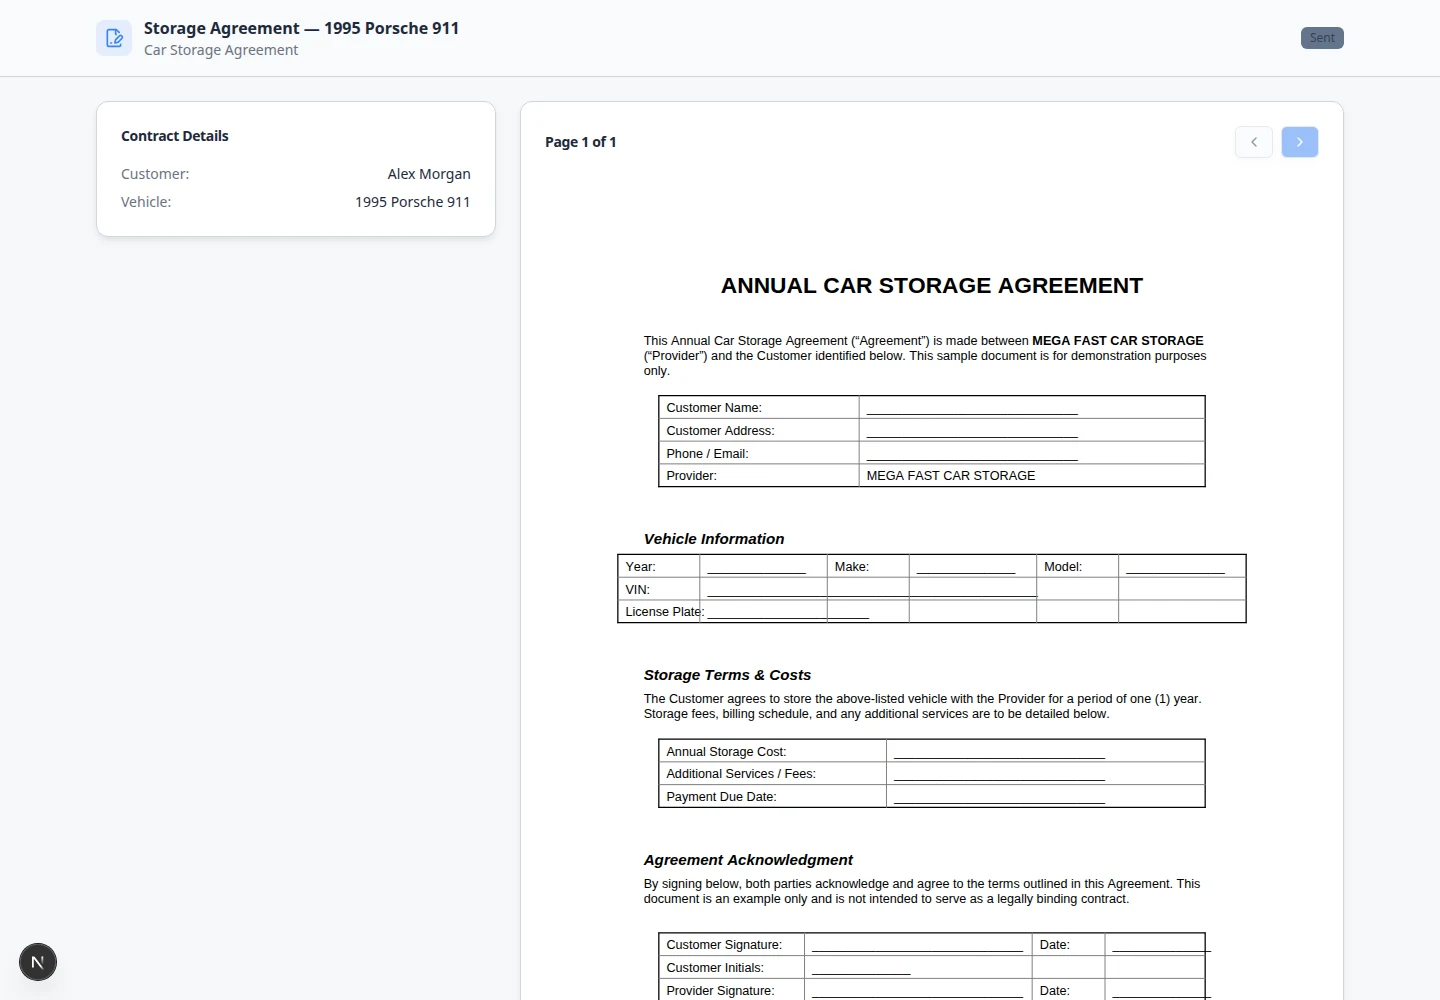
Turn on each contract template customers must sign during onboarding. Example: Car Storage Agreement.
Templates with a Car-linked badge need vehicle details on the customer record before signing.
Expected result: At least one template is selected.
- Save
Close the configuration panel and confirm your onboarding settings saved.
Expected result: The selected contract template is part of the onboarding flow.
Step 4: Put vehicle steps before vehicle contracts
If the contract uses car fields (year, make, model, VIN, license plate), the customer needs a car on their account before the agreement can fill in correctly.
- Review step order
In Customer app onboarding, make sure the step that collects car details comes before Contract Signing.
Expected result: Customers add vehicle details before they are asked to sign a vehicle-specific agreement.
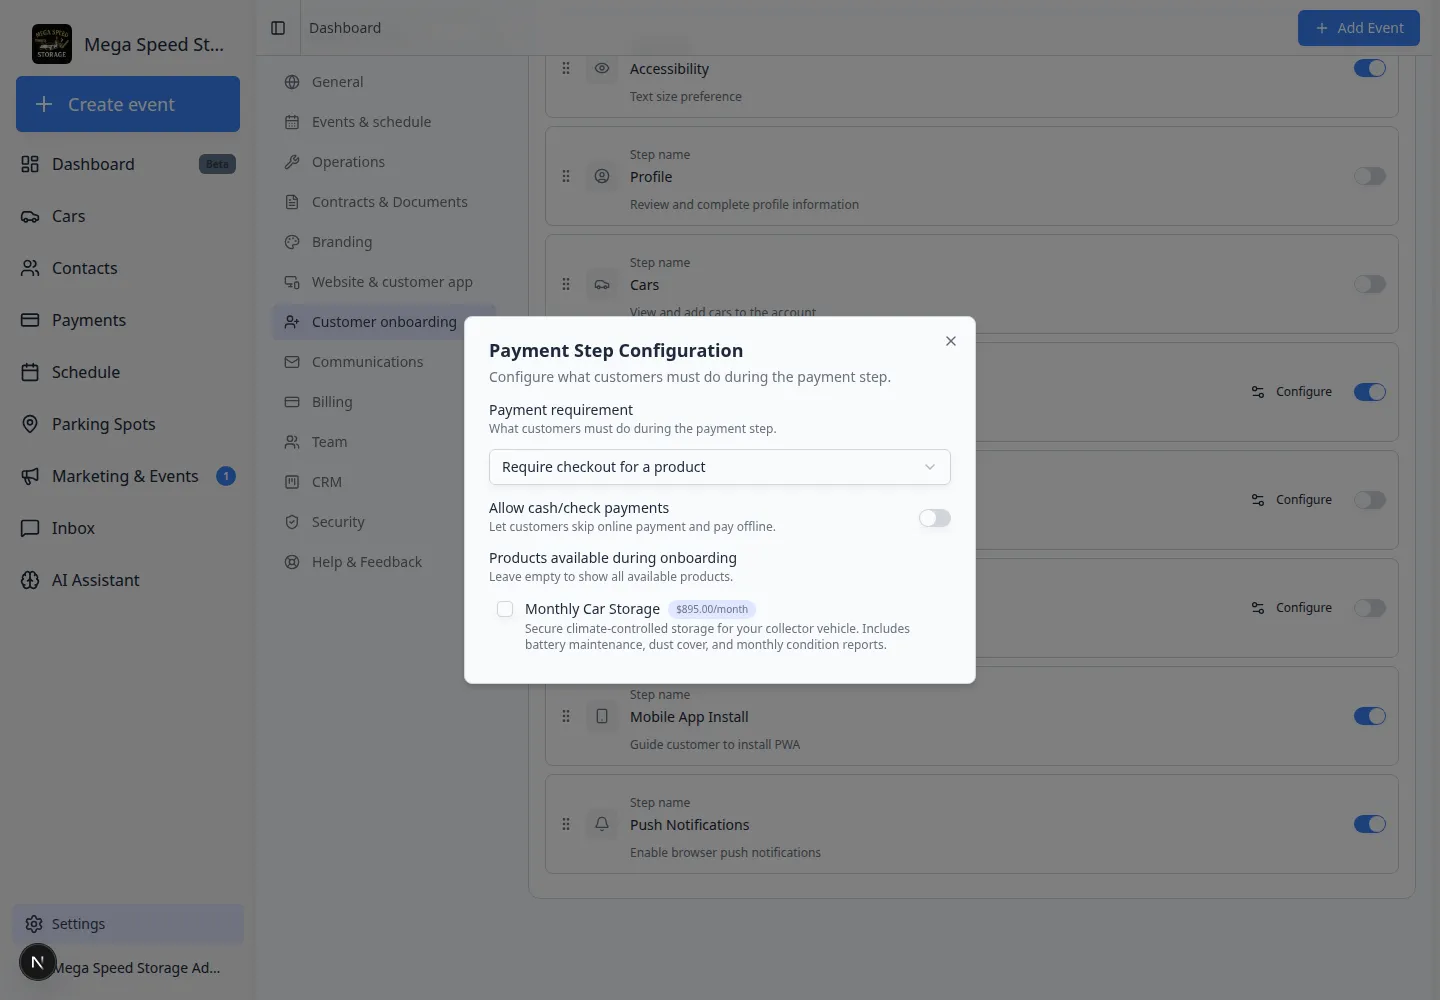
Step 5: Add document uploads if needed
If customers must also upload insurance, registration, or other files:
- Create document types
Add types in Settings > Contracts & Documents if you have not already.
- Turn on Customer Access
Enable Customer Access on each type customers should upload.
- Enable the document upload step
In the Onboarding steps list, turn on Document Upload and click Configure to pick required types in Document Upload Step Configuration.
Step 6: Test with a test customer
Before using this with real customers:
- Pick a safe test customer
Use a customer record your team can experiment with.
- Invite them to the portal
Follow your normal invite process from Contacts.
- Walk through onboarding
Sign in as the test customer (or open their portal link) and complete each step: profile, cars, uploads, and contract signing.
- Sign the test contract
Confirm the agreement opens, vehicle details look correct, and signing finishes without errors.
Expected result: The test customer can finish onboarding without staff help.
Step 7: Confirm on the customer record (staff view)
- Open the test customer in Contacts
Go to Contacts and open the test customer.
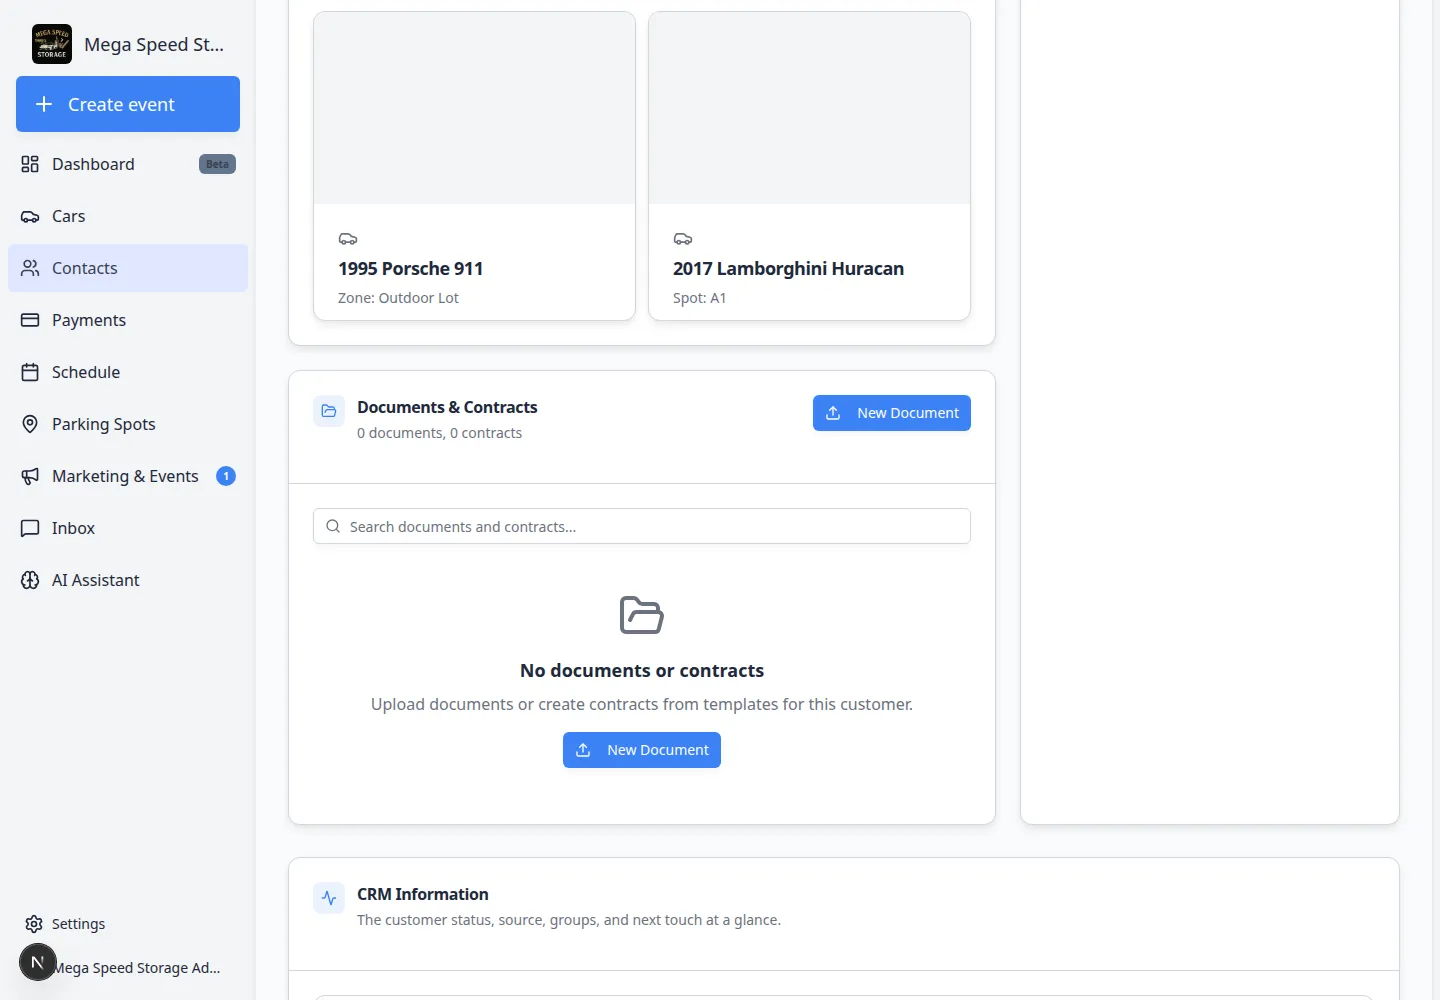
- Review Documents & Contracts
Scroll to Documents & Contracts and confirm:
- The contract appears.
- Status shows Signed or Completed after signing.
- The signed PDF can be viewed or downloaded.
- Required uploads appear if you enabled them.
What success looks like
- The correct template is selected in customer onboarding.
- Vehicle collection happens before signing when the contract needs car details.
- Required document uploads appear only when configured.
- A test customer completes the full flow without getting stuck.
- Staff can find the signed agreement on the customer record.
Troubleshooting
What to do next
After onboarding is tested, share portal invites or registration links with real customers.
For a single customer outside onboarding, use Send a contract for signature.
When customers need help during first login, share Help customers complete onboarding paperwork with front-desk staff.