Cars
Export your vehicle inventory report
Download a spreadsheet of every vehicle record for insurance audits, accountant handoffs, and offline reviews.
Use the Cars Report when you need every vehicle record in one file—not just what fits on the screen at once.
This is common before an insurance audit, when your accountant asks for a full inventory list, or when a manager wants to review declared values and parking details offline.
What you will accomplish
You will open the Cars Report, choose which columns to include, and download a CSV or Excel file of your facility’s vehicle records.
Expected outcome: A file opens in Excel, Google Sheets, or Numbers with one row per car and the fields you selected.
When to use the Cars Report
- Your insurance company or bank asks for a complete vehicle inventory.
- You need to share parking spots, declared values, or customer names with an owner who prefers spreadsheets.
- You want to review many cars at once without clicking View on each record.
- You are comparing active vs. archived cars and need both in one export (use filters on the main Cars page first if you only want one group).
Before you start
- Sign in to the dashboard with a role that can view Cars.
- Know whether you need CSV (simple, opens everywhere) or Excel (
.xlsx, better column formatting in Microsoft Excel). - Decide which columns matter for your export—for example Declared Value, Parking Spot, Customer Name, or Insurance Exp.
Step 1: Open Cars Report
- Go to the Cars page
In the left sidebar, open Cars.
Expected result: You see your facility’s vehicle list with Search and Filters & Settings near the top.
- Click Report
Near the top-right of the page, click Report (file icon on phones and small tablets).
Why this matters: Report opens a separate page built for export—not the same as scrolling the main list.
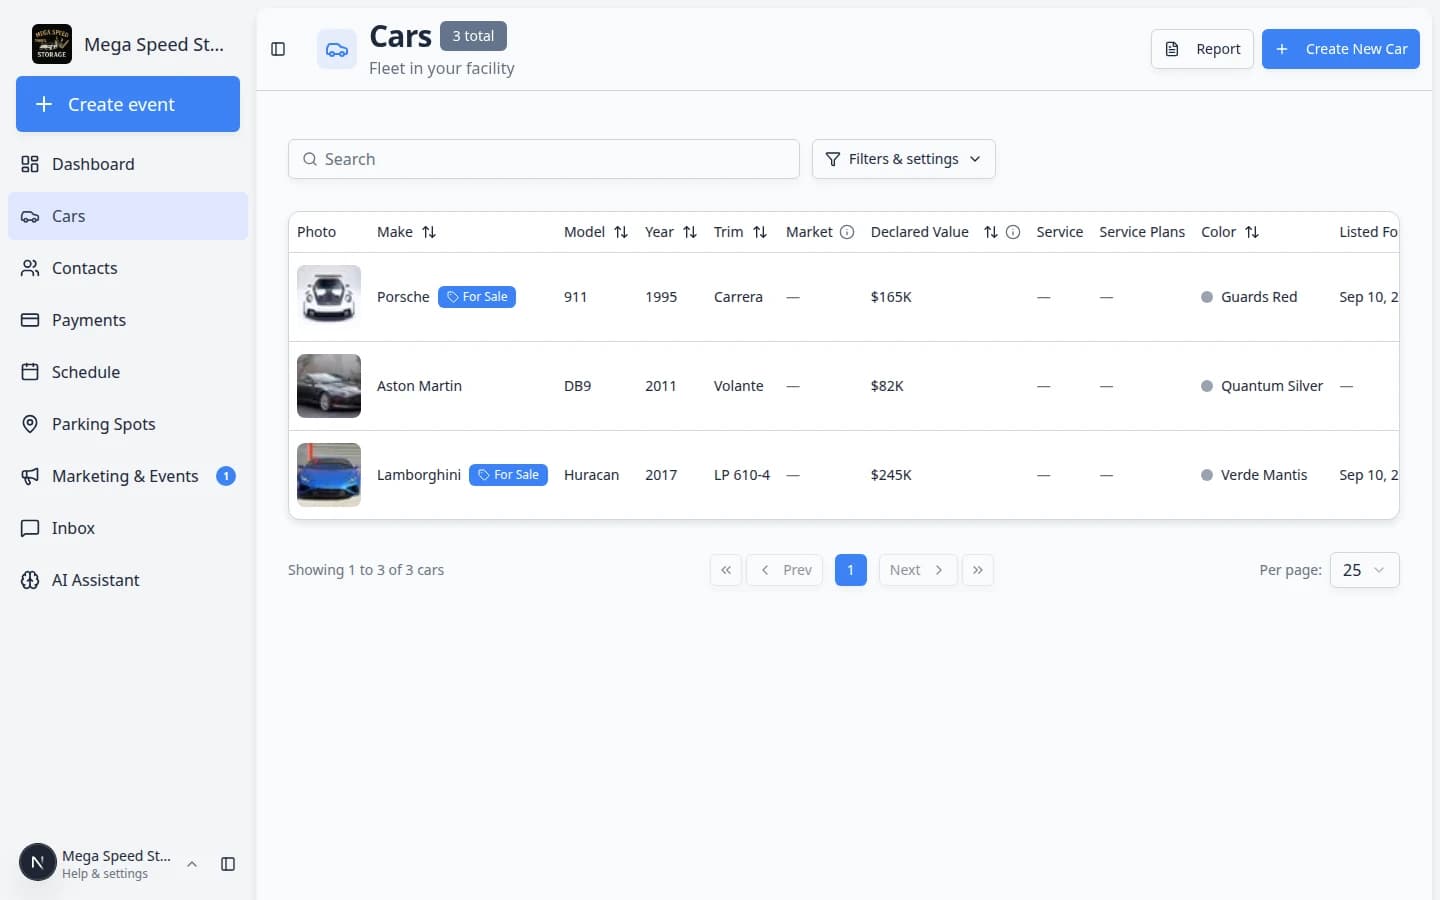
**Report** sits beside **Create New Car** on desktop. On a phone, look for the file icon in the page header. - Confirm the report page loaded
The page title should read Cars Report with the subtitle Export and review vehicle records.
Expected result: You see a table of vehicles and an Export button above the list.
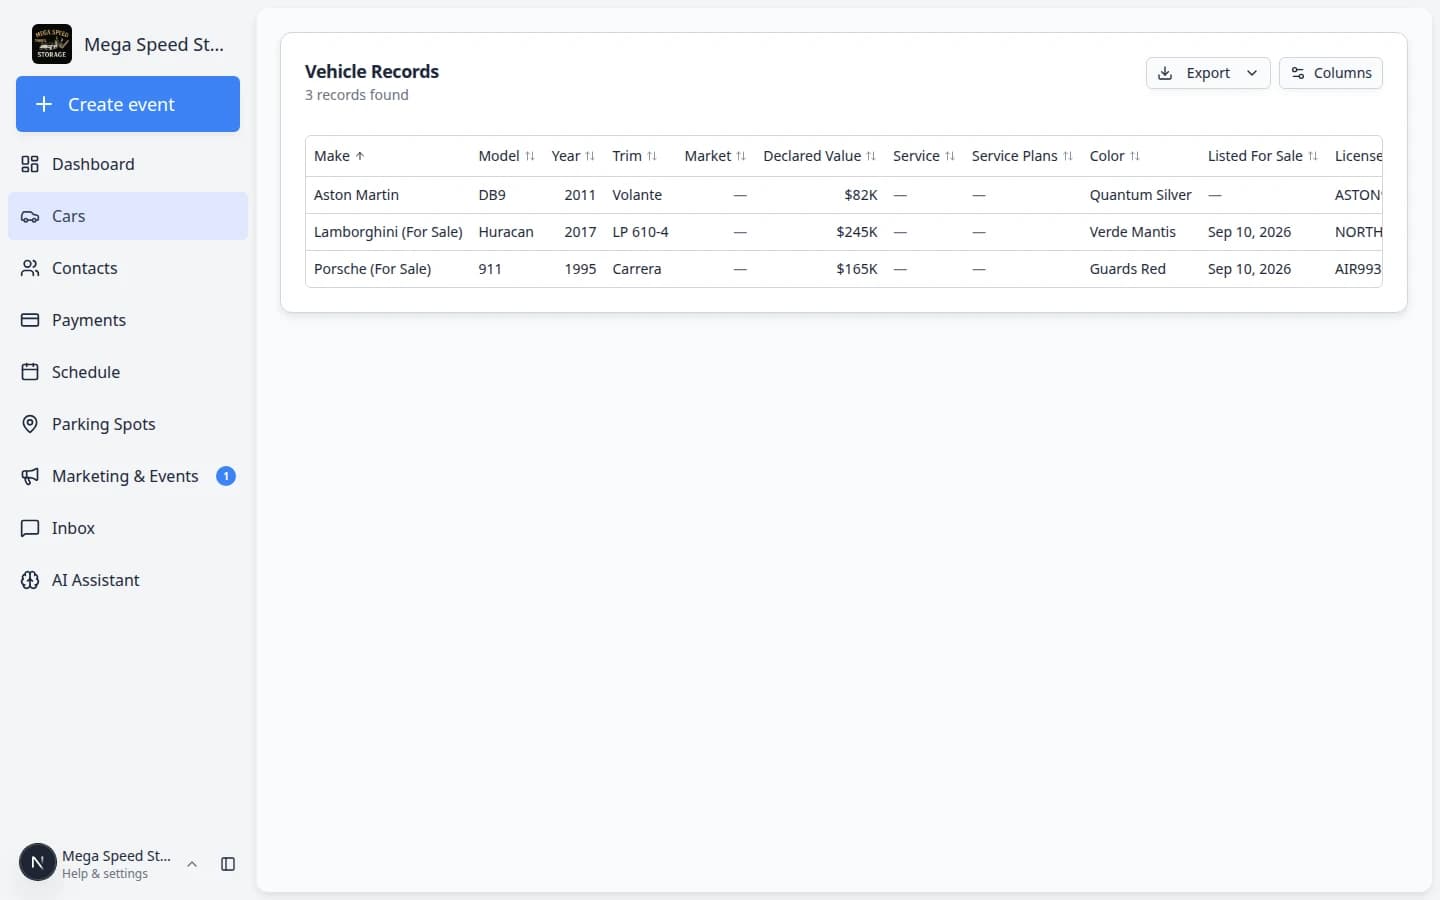
Step 2: Choose columns (optional)
- Click Columns
Above the table, click Columns (same control as on the main Cars list).
- Turn columns on or off
Check or uncheck fields your recipient needs. You can show VIN, License Plate, Declared Value, Market, Parking Spot, Customer Email, Archived, and many others.
Why this matters: A shorter export is easier to read. An insurance audit may need VIN and declared value; your accountant may need customer names and spots.
- Reorder columns if helpful
Drag column names in the Columns panel to change the order in the table and in the export file.
Expected result: The on-screen table matches the column order you chose.
Step 3: Export the file
- Click Export
Click the Export button above the vehicle table.
- Pick CSV or Excel
Choose Export as CSV or Export as Excel.
- CSV — plain text table; best when you will upload to another system.
- Excel —
.xlsxfile; best when your team lives in Microsoft Excel.
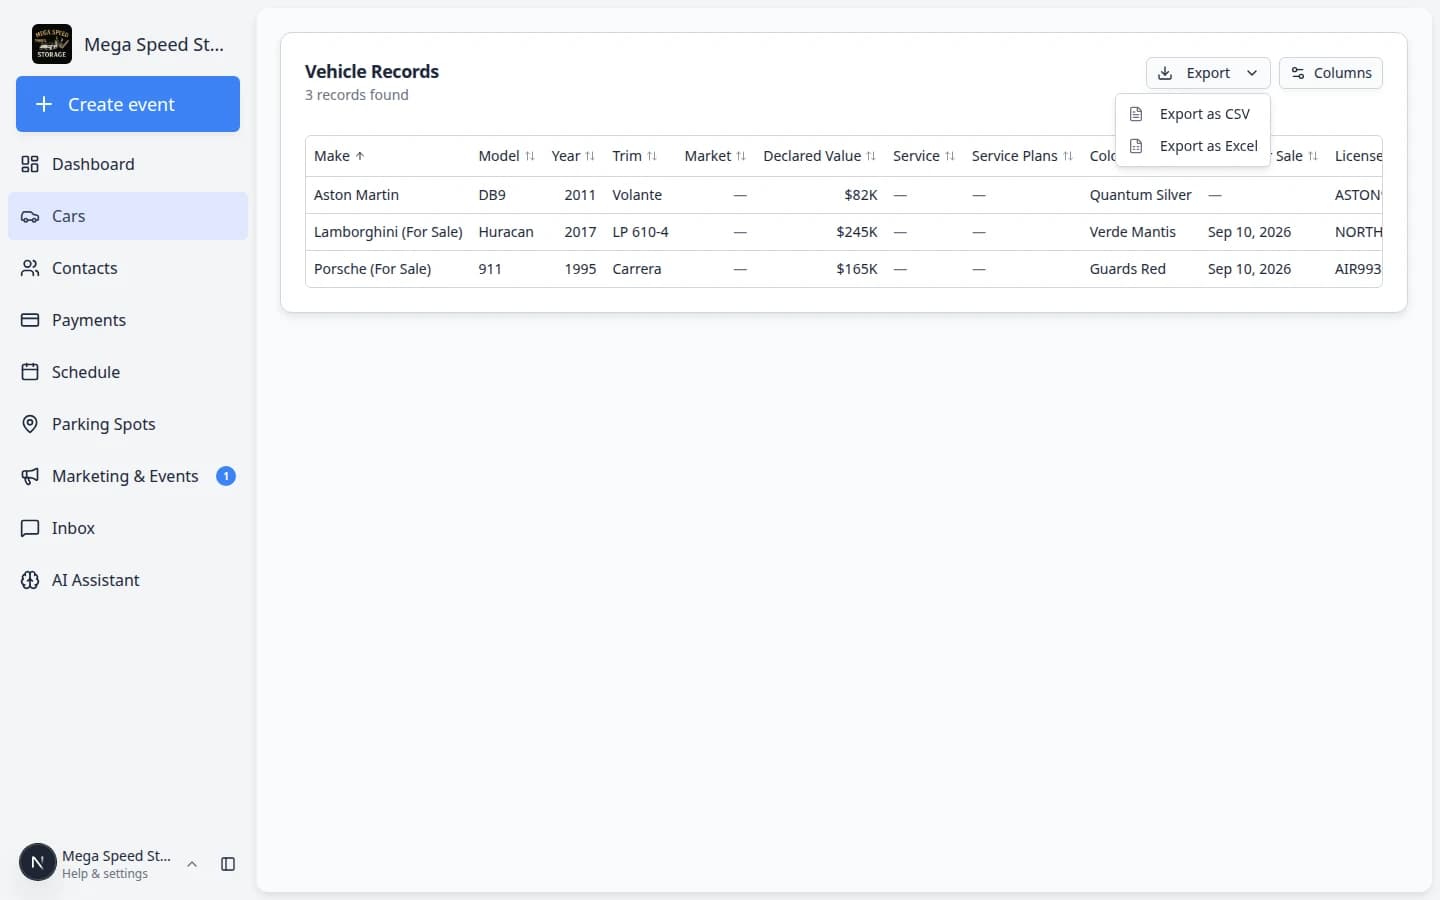
The export uses the columns currently visible in the report table. - Save the download
Your browser downloads the file. Open it and spot-check a few rows.
Expected outcome: Row count matches the Vehicle Records count on the report page (unless your browser blocked the download).
Step 4: Spot-check the export
- Open three random rows
Compare year, make, model, plate, and customer name against live records in the app.
- Confirm archived cars if needed
If you expected departed vehicles in the file, make sure the Archived column is turned on in Columns before you export again.
- Share safely
Vehicle exports may include customer names, addresses, and values. Send the file only to people who should see that information.
Why this matters: Treat exports like sensitive customer records—not casual email attachments.
Common mistakes to avoid
- Do not assume the main Cars list export exists—use Report for a full download.
- Do not export before choosing columns, then wonder why VIN or declared value is missing.
- Do not share exports on personal text threads when your facility policy requires secure file transfer.
Troubleshooting
What to do next
- Hide departed cars from daily work with Archive or restore a vehicle.
- Review declared values on individual records with View and edit vehicle details.
- Import many new records at once with Import vehicles from a spreadsheet.