Settings
Set up printable QR codes
Create stable short-link QR codes for customer login, vehicle records, or front-desk handouts—and change the destination later without reprinting.
Use this guide when your facility wants printed QR codes at the front desk, on a car windshield card, or on a showroom poster—and you need the link to stay the same even if you update where it goes later.
What you will accomplish
- Open Settings > QR codes (when your account includes this feature).
- Create a QR code linked to a customer, vehicle, or unlinked destination you assign later.
- Customize colors and an optional center logo so the code matches your facility branding.
- Download a ZIP of PNGs or a printable PDF for labels and posters.
- Test-scan a code with your phone before you print hundreds of copies.
Before you start
- You should be signed in as a team admin or someone with permission to edit dashboard settings.
- Confirm QR codes appears in your Settings sidebar. If you do not see it, ask your Car Storage Software contact to enable QR codes for your facility.
- Finish Set up facility branding so optional center logos look correct.
- For vehicle or customer codes, create the record first in Cars or Contacts.
Open QR code settings
- Open Settings
From the Dashboard, click Settings in the left sidebar.
- Choose QR codes
In the settings category list, click QR codes.
Direct link: Settings > QR codes.
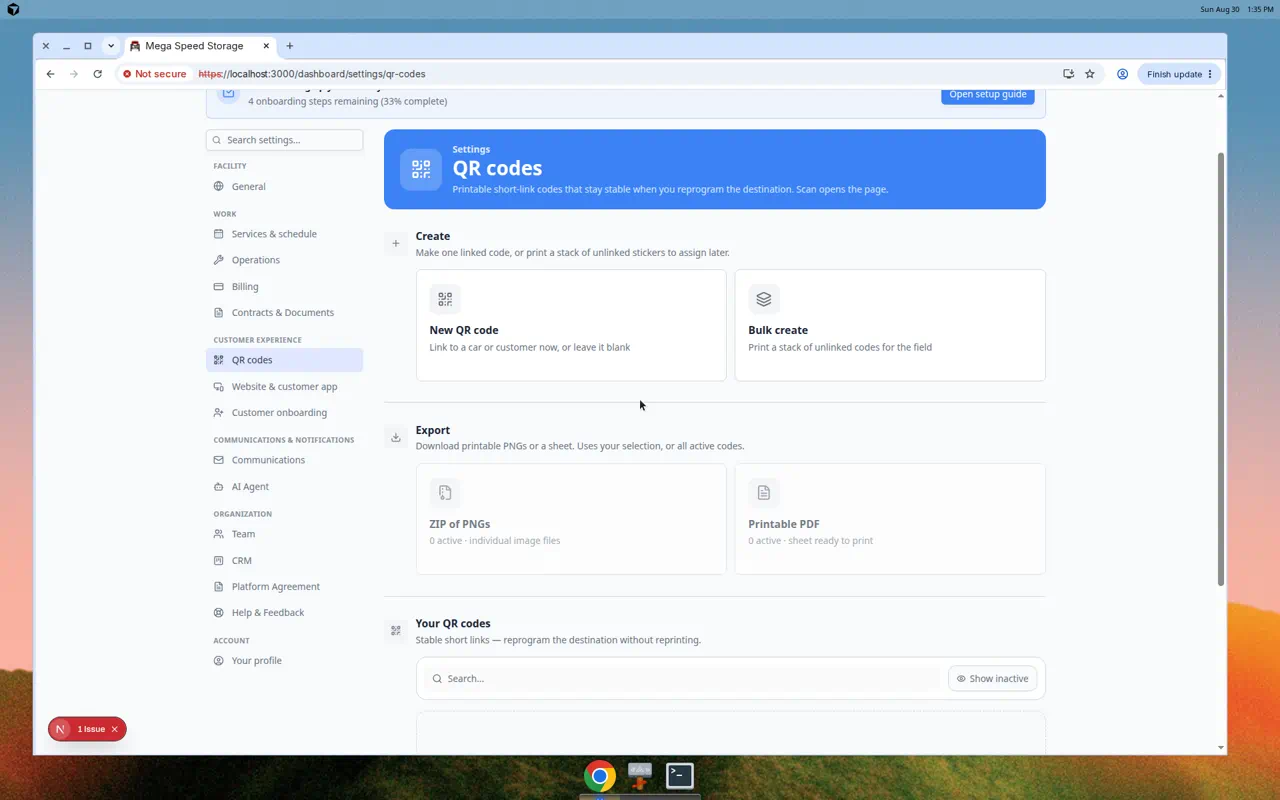
Expected result: The page title is QR codes with a short description about printable short-link codes.
Create one QR code
- Click New QR code
In the Create section, click New QR code.
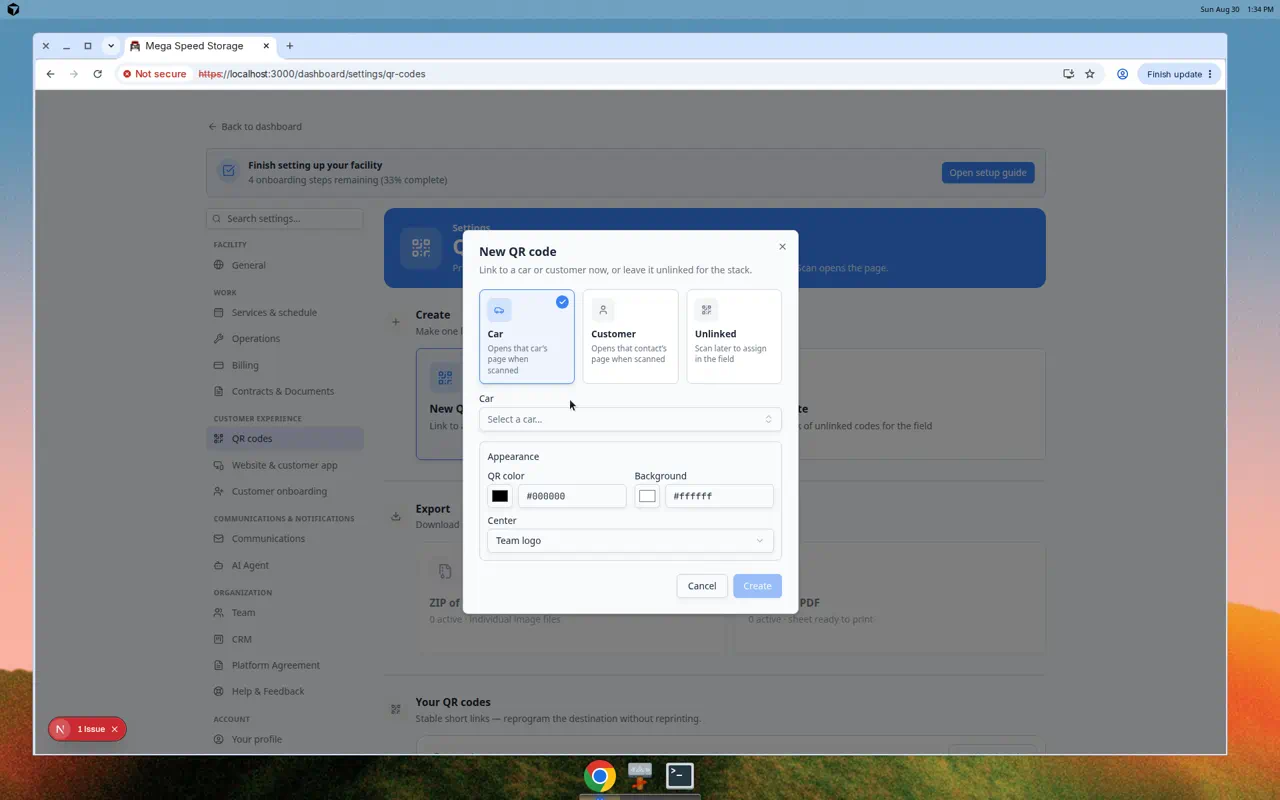
Expected result: A window titled New QR code opens.
- Choose what the code links to
Pick one of three link types:
- Car — opens a specific vehicle record (good for windshield cards or keys).
- Customer — opens a customer profile or portal path for that owner.
- Unlinked — creates a code you assign later (good when you print labels before intake).
Why this matters: Choosing the right type up front saves reprinting. You can change where an unlinked code points without changing the printed image.
- Select the car or customer (when linked)
If you chose Car or Customer, use the search box to find the correct record.
Read the year, make, model, and plate (or customer name) carefully before you continue.
- Adjust appearance (optional)
Change QR color, background color, or add a center logo so the code matches your shop's look.
Dark QR on a light background scans best under fluorescent shop lighting.
- Click Create
Click Create at the bottom of the window.
Expected result: The new code appears in Your QR codes with a preview image and short URL.
Create many codes at once
Use Bulk create when you need QR labels for every car on a new row or every customer in a mailing list.
- Click Bulk create
In the Create section, click Bulk create.
- Choose cars or customers
Follow the prompts to select multiple records. The app creates one code per record.
- Review the list
Scroll Your QR codes and spot-check a few rows before you export for printing.
Expected result: Each vehicle or customer has its own code and short URL.
Export for printing
- Open the Export section
On Settings > QR codes, find Export.
- Choose ZIP of PNGs or Printable PDF
- ZIP of PNGs — one image file per code. Use this for custom label software or a print shop template.
- Printable PDF — a ready-to-print sheet. Use this for quick front-desk handouts.
Why this matters: PNGs give designers flexibility. PDFs are faster when you need ten identical cards today.
- Test-scan before a large print run
Open one exported PNG on your monitor or print a single test label. Scan it with your phone camera.
Expected result: The phone opens the correct customer or vehicle page—not an error screen.
Change where a code goes (without reprinting)
QR codes use a short link that stays stable. You can update the destination in the app when a car sells or a customer moves units.
- Find the code in Your QR codes
Use the search box or scroll the table on Settings > QR codes.
- Open the row menu
Click Edit or the link action on that row (wording may vary by screen size).
- Assign a new car or customer
Pick the new destination and save.
Expected result: The same printed sticker now opens the updated record. You do not need a new QR image.
Common uses at car storage facilities
Front desk customer login — Unlinked code on a tabletop tent; destination points to your customer login link.
Windshield intake card — Car code on a laminated tag so porters open the right record from the lot.
Showroom poster — Unlinked or customer code for an event RSVP or registration page from Facility Web Pages.
Keys and valet tags — Car code tied to the vehicle so anyone scanning sees location and owner contact rules your team configured.
Troubleshooting
What to do next
- Copy public customer links from Configure portal and website.
- Print a facility QR for events with Create a social event (event-specific QR codes live on the marketing event page).
- Return to Settings overview for your full setup checklist.